
After struggling a bit longer to connect the Business Central API to my Synapse Pipelines and painstakingly gathering the information, I want to share my findings with you. Maybe it will help you get to your solution faster.
In my search on this topic, I first found Ben Zhai’s post in the Q&A section of Microsoft Learn Platform on the question „How to connect Business Central to Azure Data Factory„. Who in turn referred to a post by Vjekoslav Babic on „How do I: Really set up Azure Active Directory based authentication for Business Central APIs„.
But it wasn’t until Microsoft Dynamics 365 Business Central documentation on „Using Service-to-Service (S2S) Authentication“ that I had a breakthrough.
Since the mentioned posts are already a bit outdated and the Microsoft documentation does not contain any pictures for orientation and is quite general in some places. You now get my own step by step guide.
Register an Azure AD Application for authentication to Business Central
Sign in to your Azure Portal and go to the Azure Active Directory.
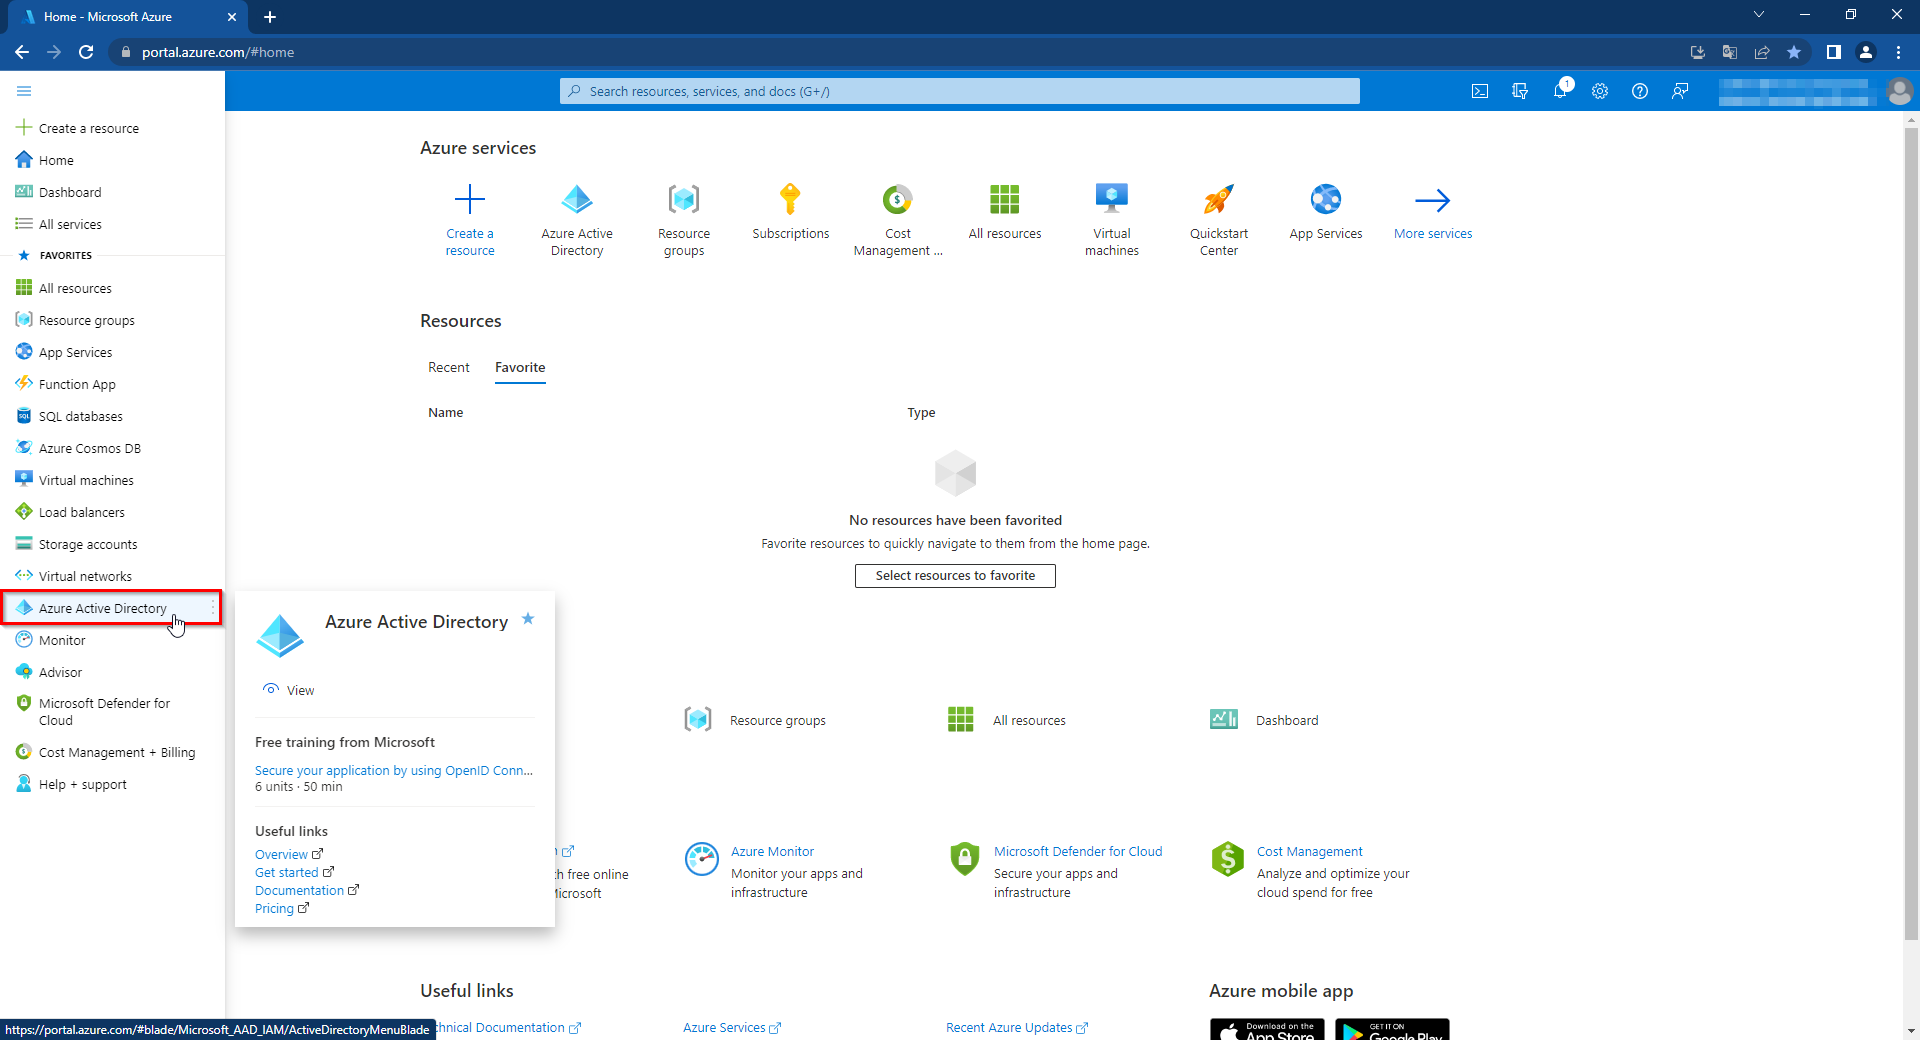
Go here to App registrations and then to New regestration

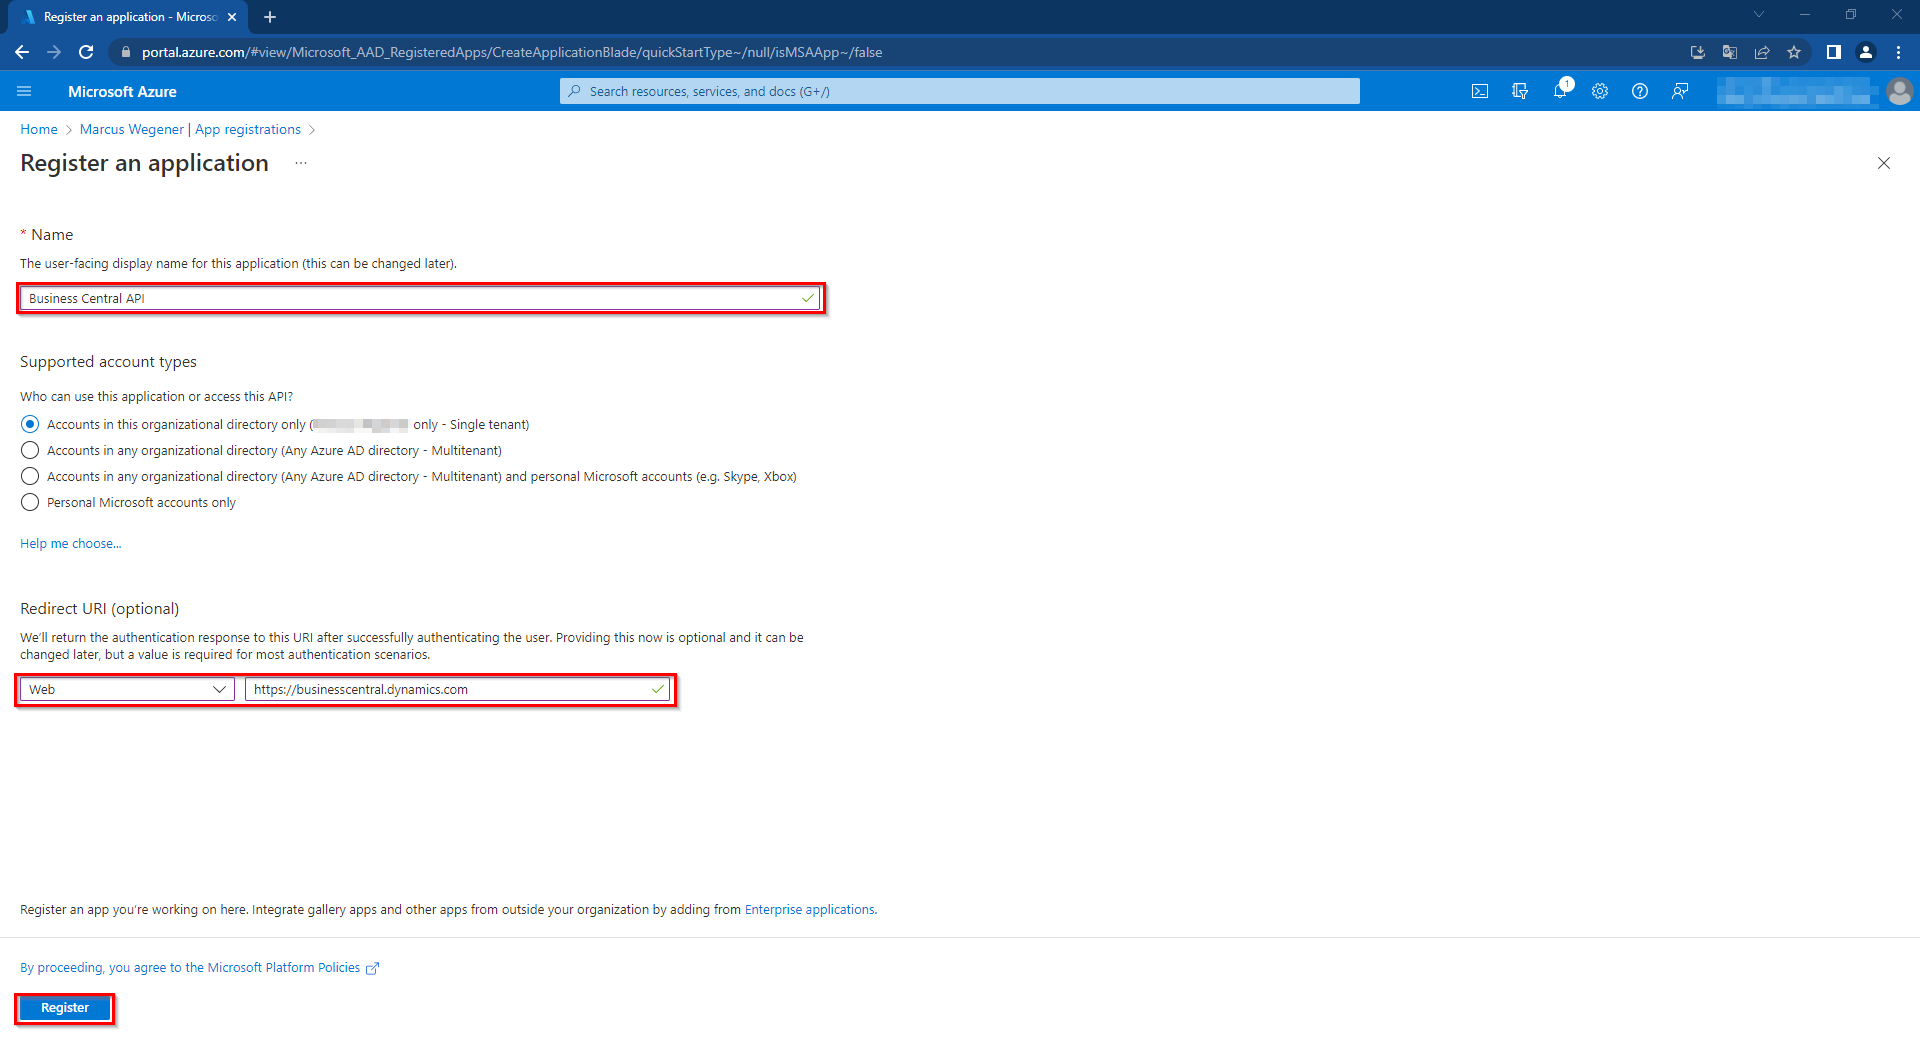
In the form I entered the following values and clicked Register:
Name: Business Central API – Specify a unique name for your application.
Supported account types: Accounts in this organizational directory only (Microsoft only – Single tenant) or Accounts in any organizational directory (Any Azure AD directory – Multitenant)
Redirect URI: https://businesscentral.dynamics.com/
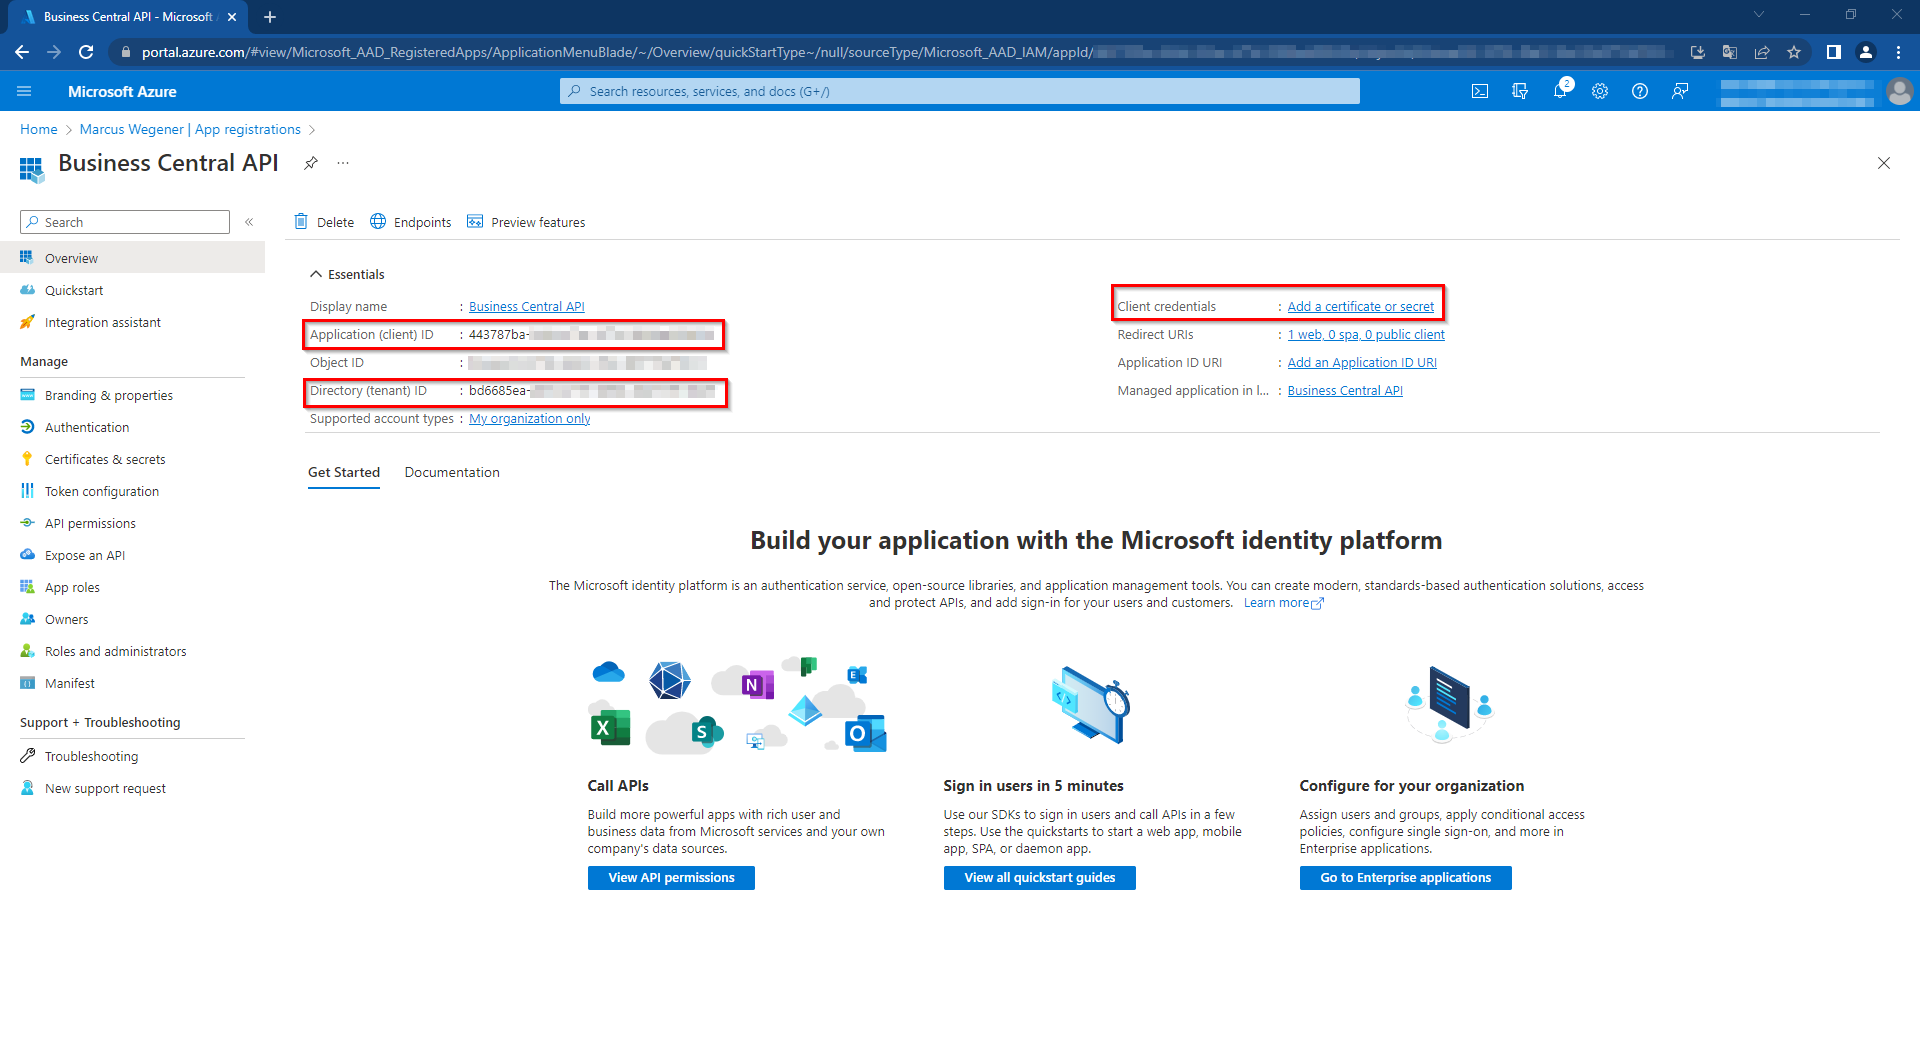
Then an overview opens, from which we save the Application (client) ID and Directory (tenant) ID for later, before we click on „Add a certificate or secret„.
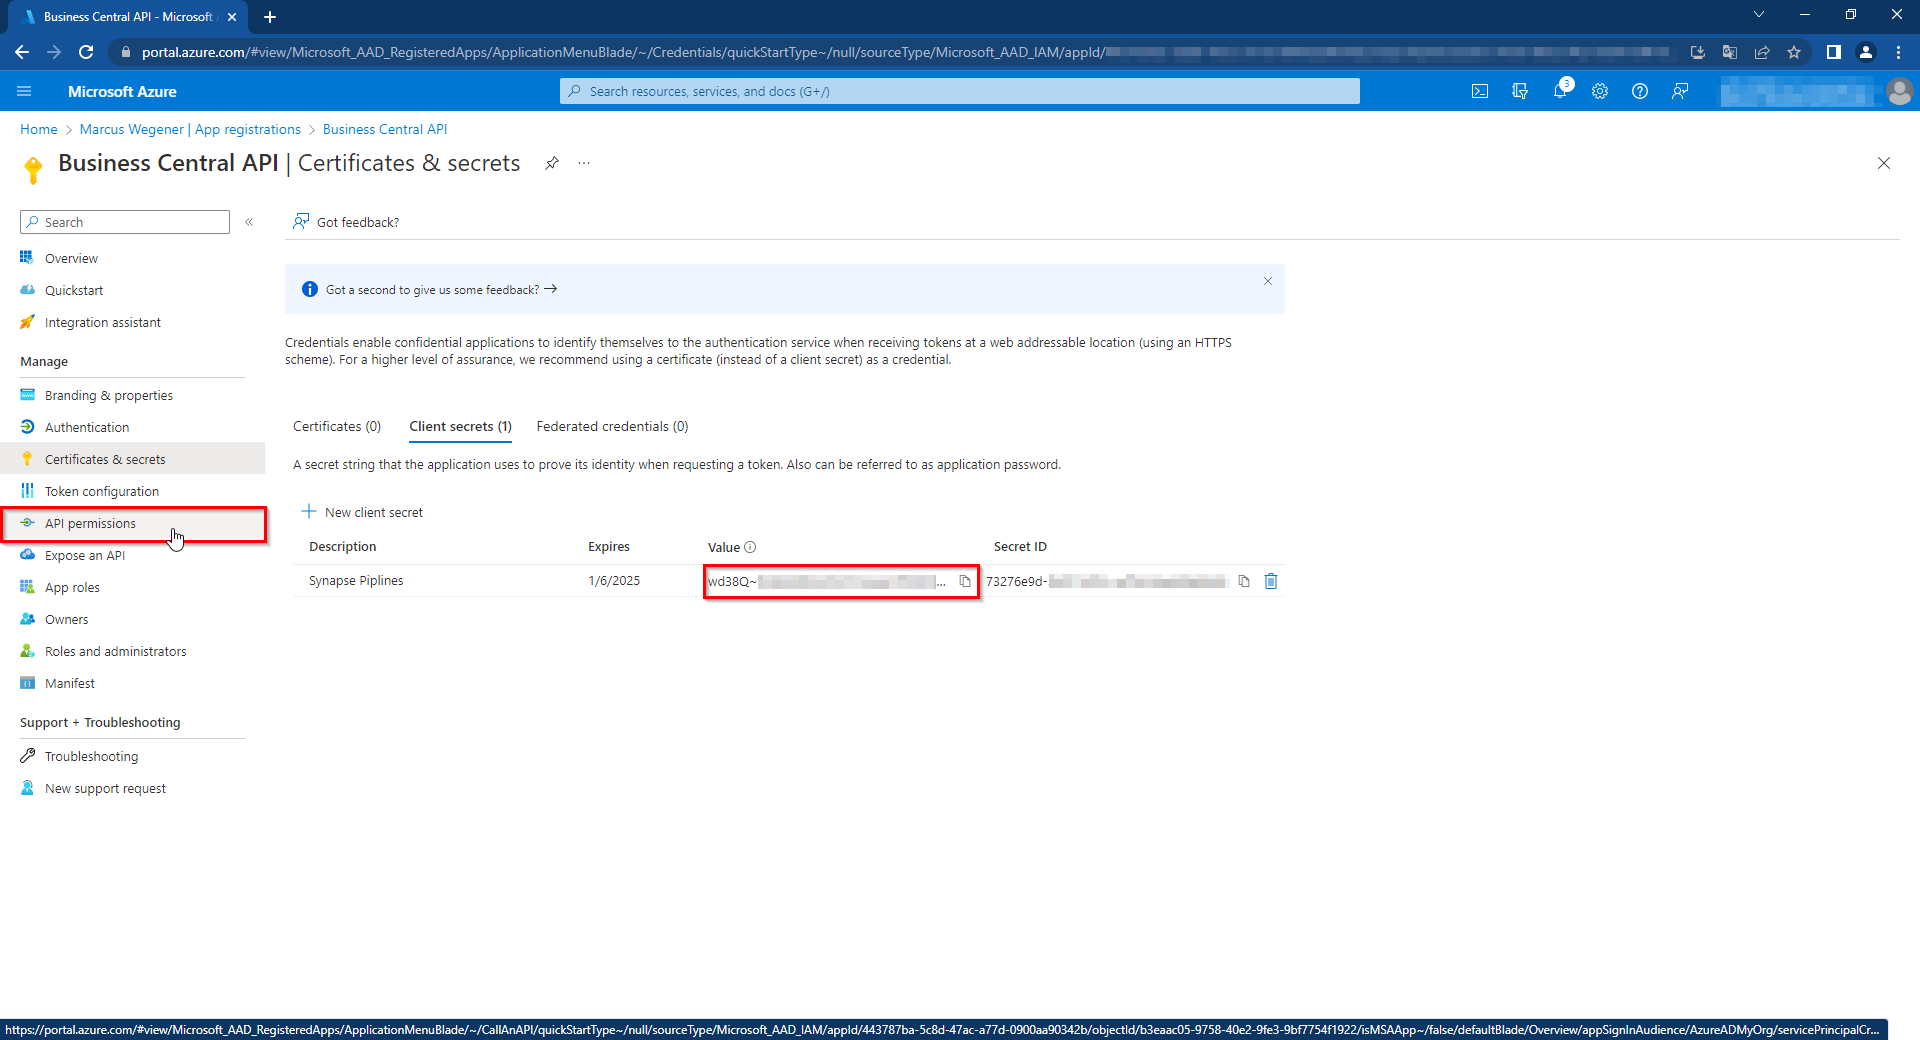
Here we create a „New client secret„. As Description I have chosen „Synapse Pipelines“ and set Expires to „24 month“.
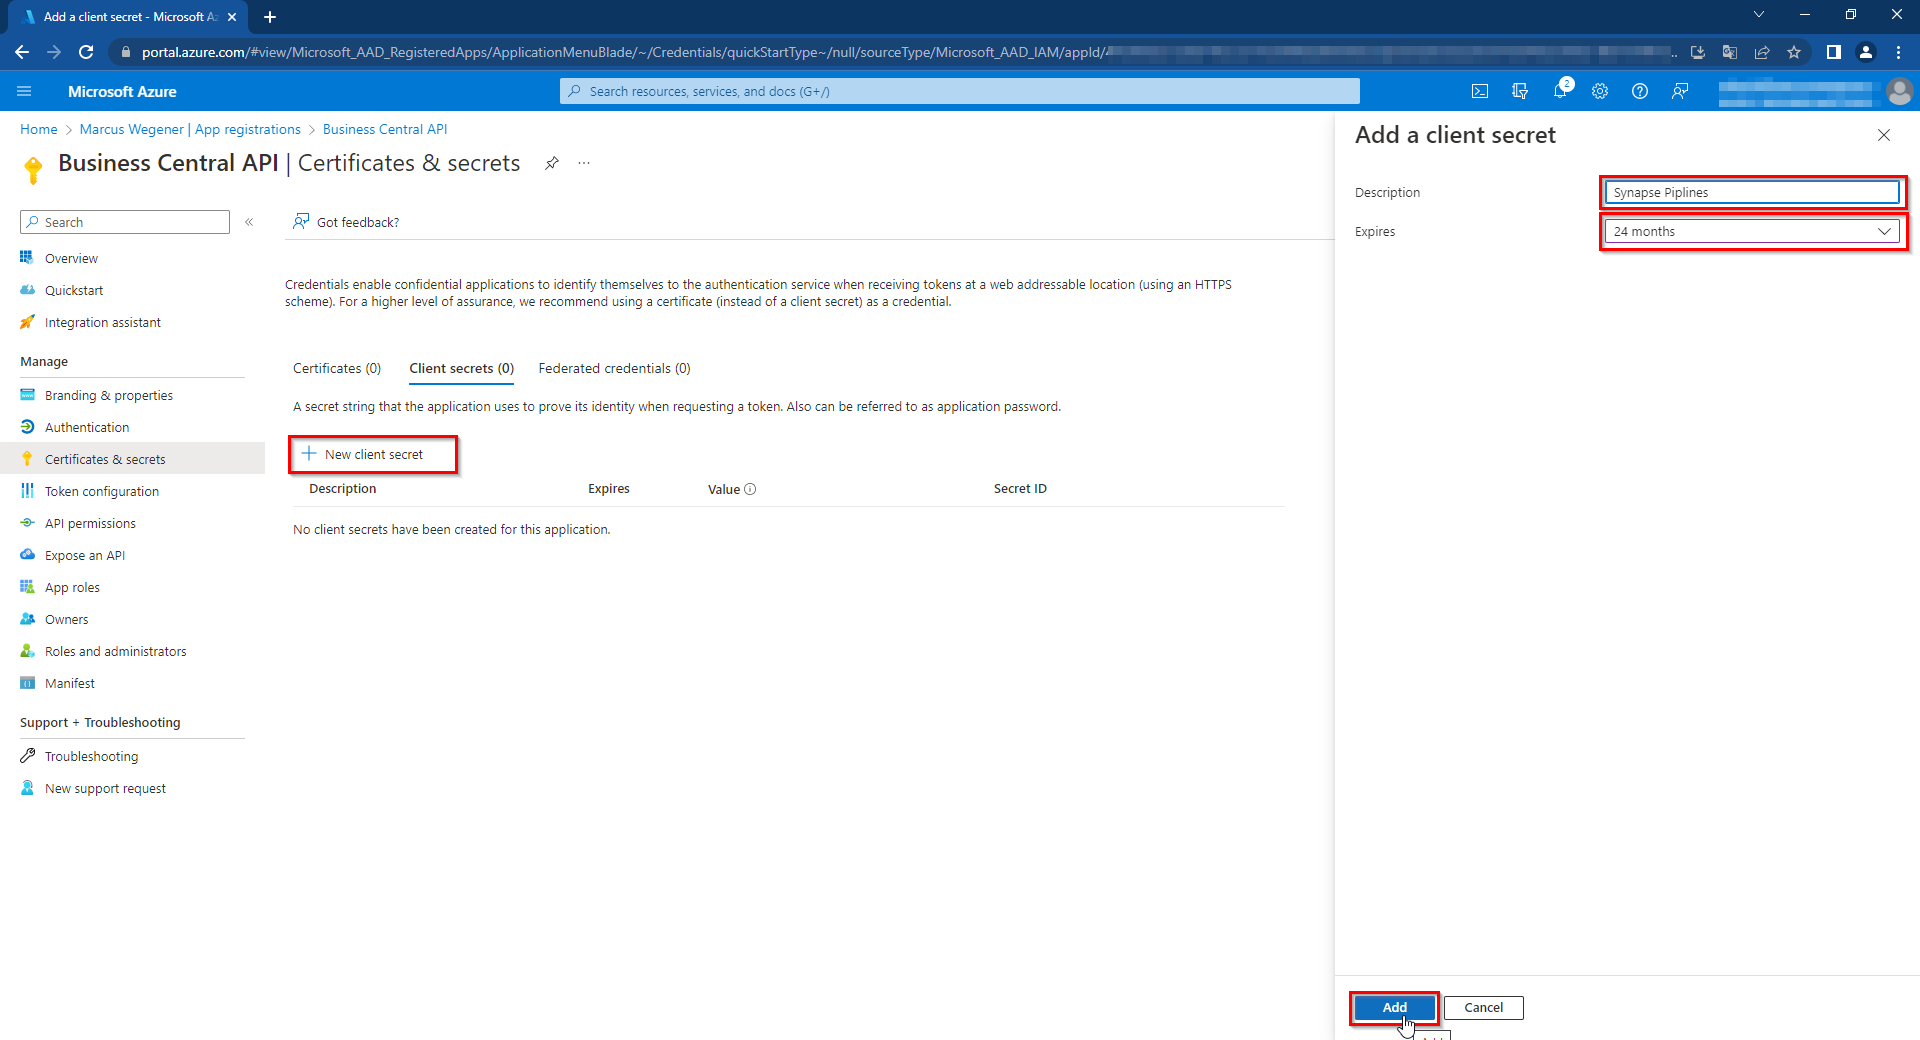
Then we save the key from the Value field for later use and switch to „API permissions„.
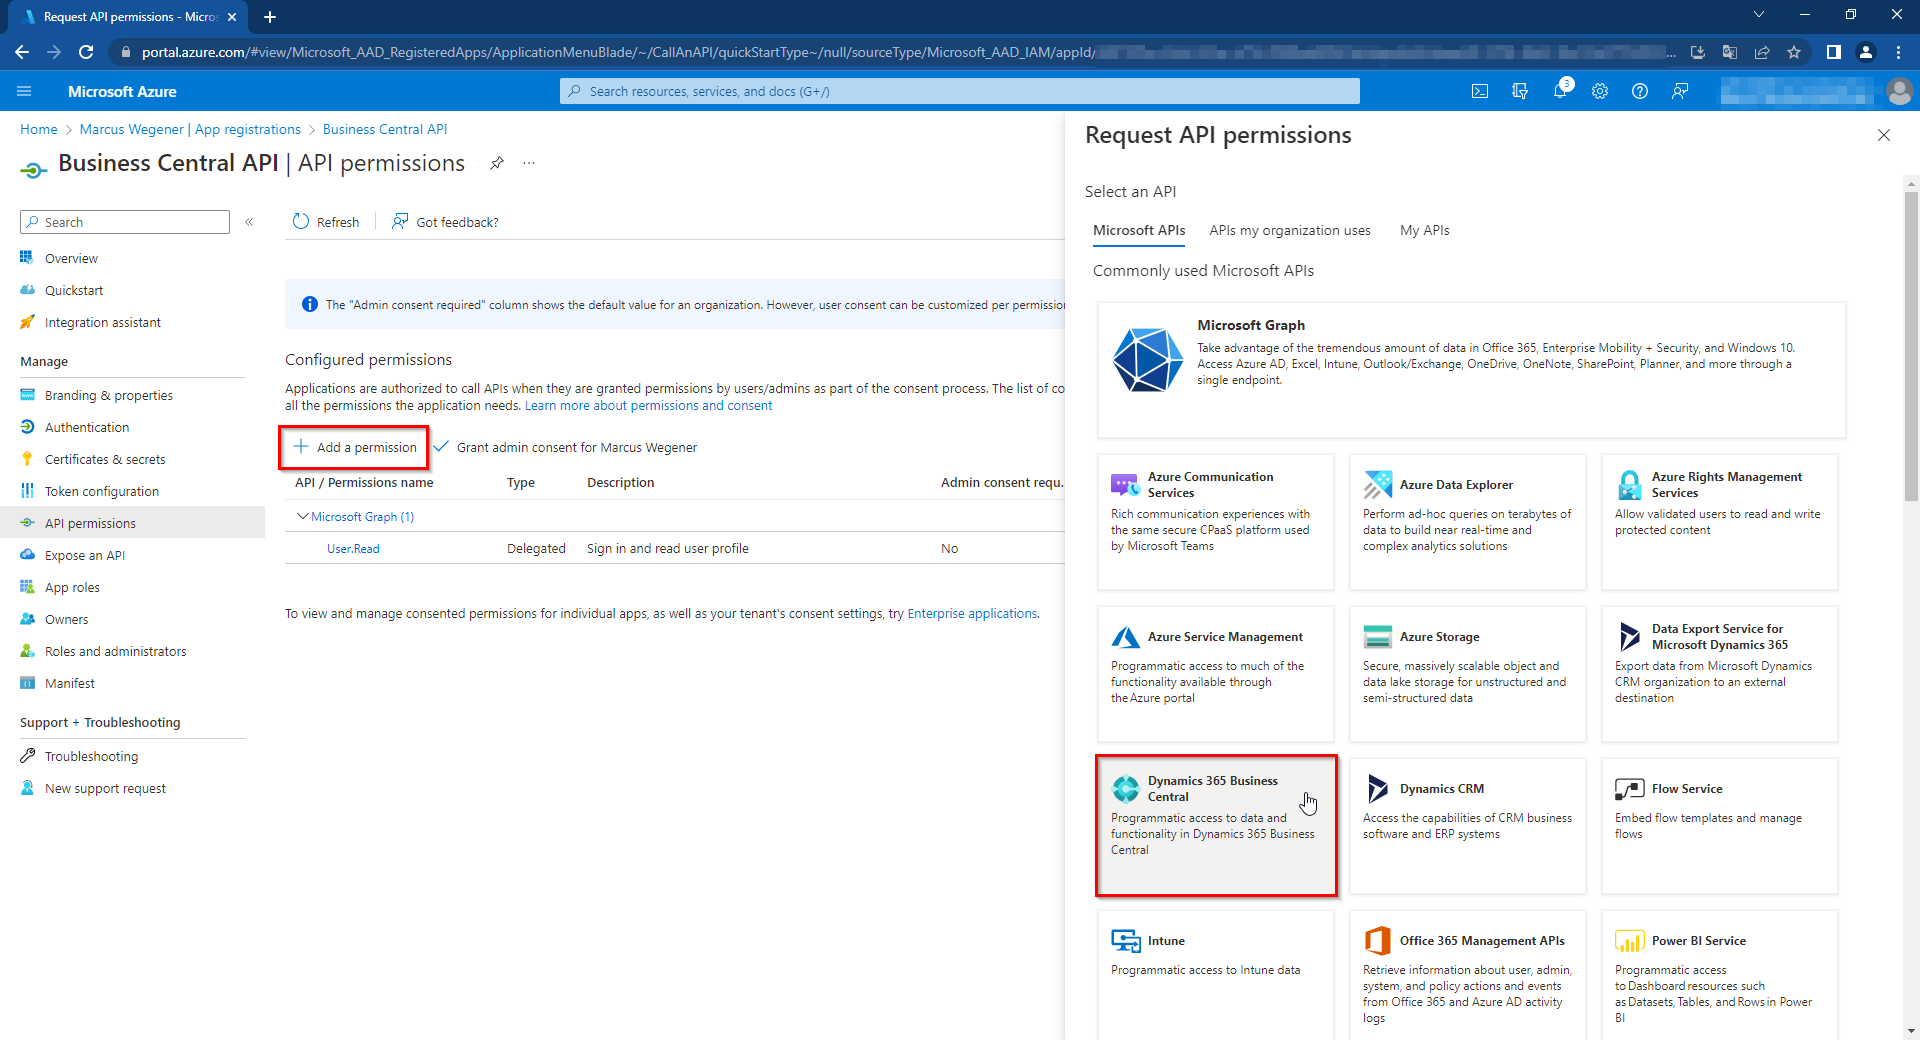
Here, we add request API permissions via „Add a permission„. We choose Dynamics 365 Business Central as the Microsoft API.
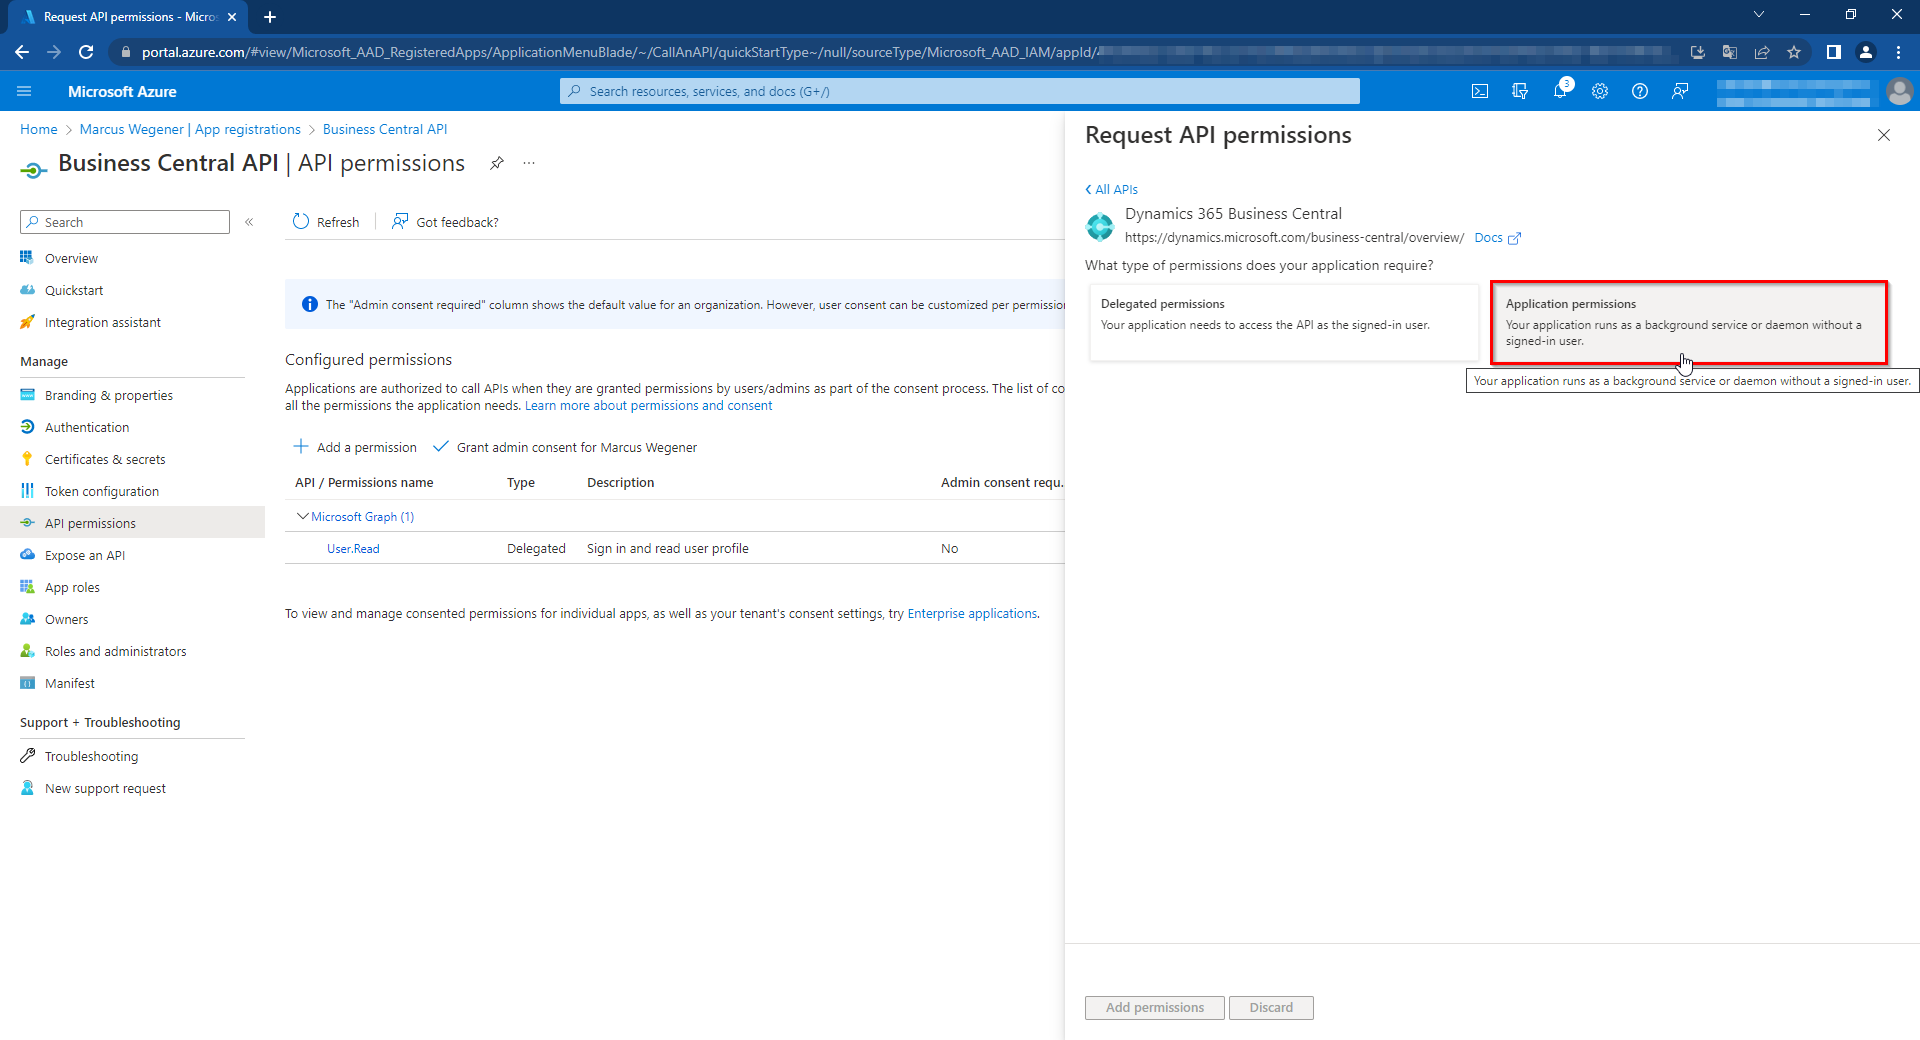
The required permissions are „Application permissions„.
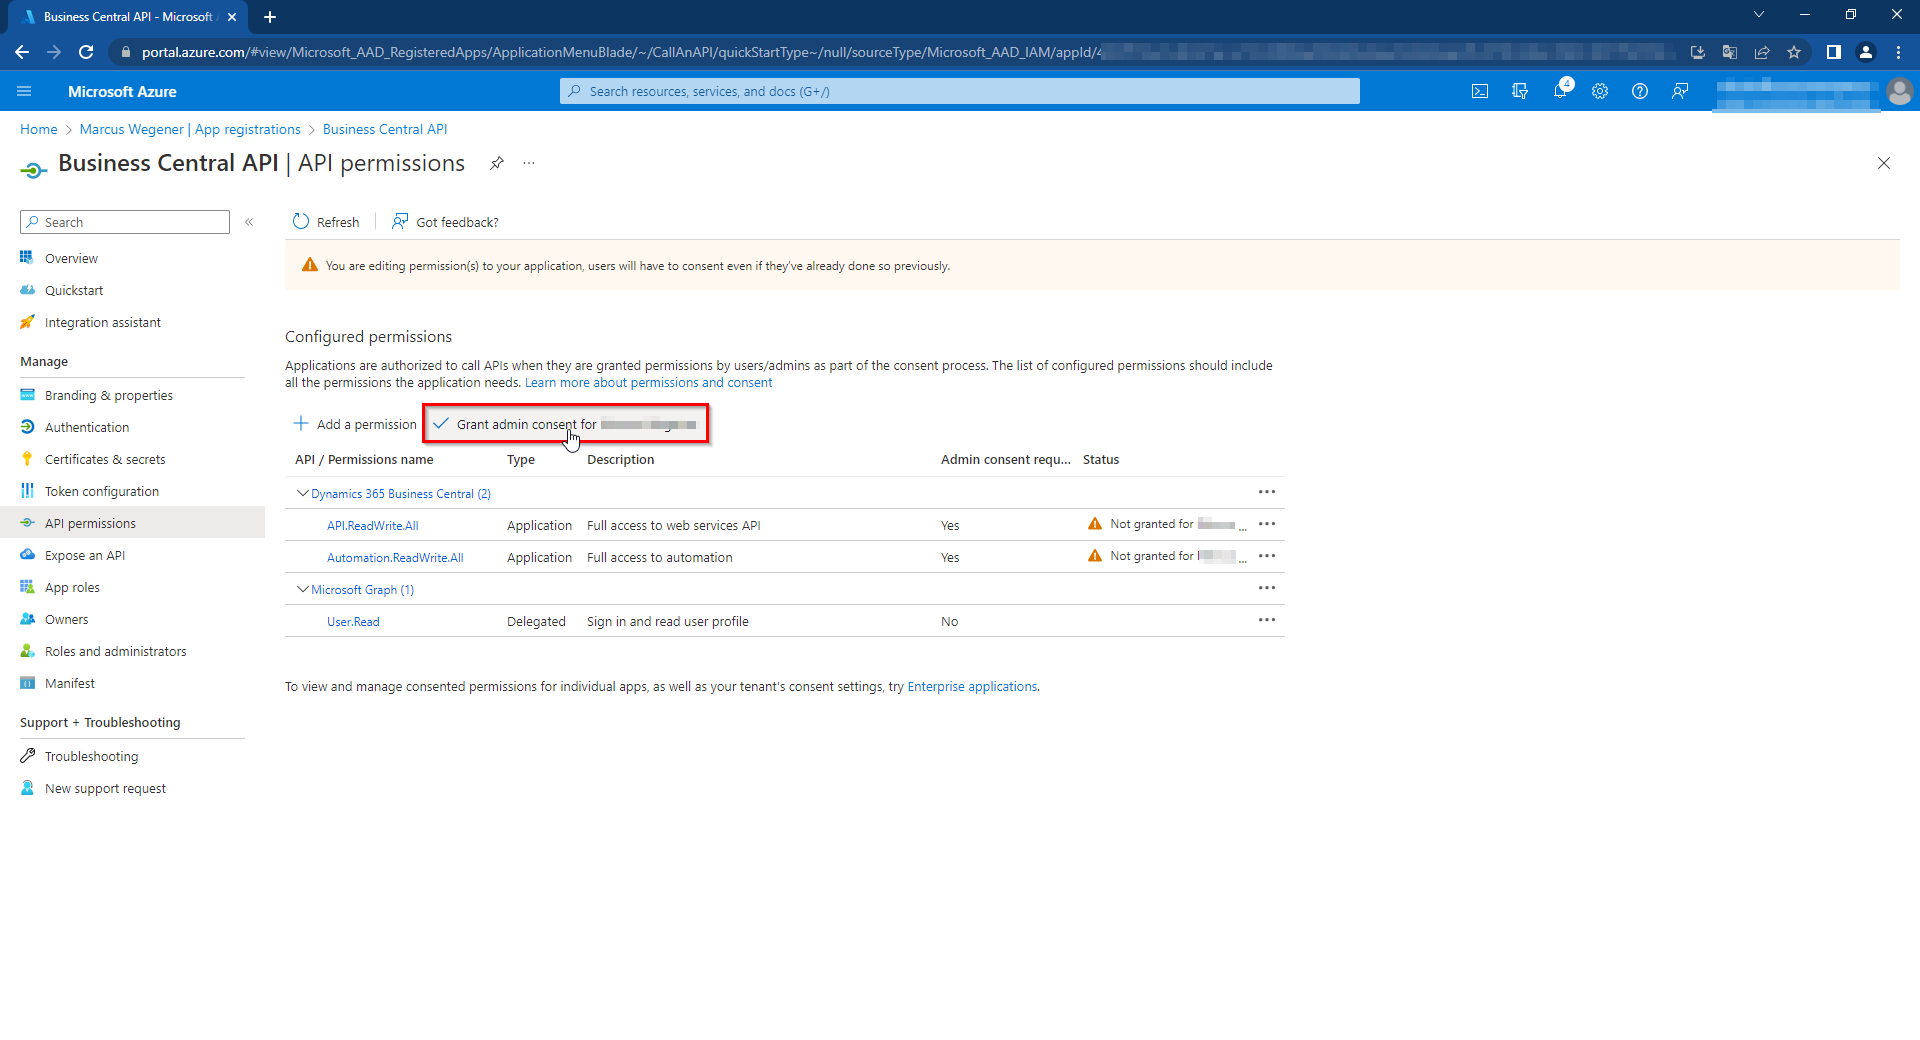
For Application permissions we select „API.ReadWrite.All“ and „Automation.ReadWrite.All“ and add them via „Add permissions„.
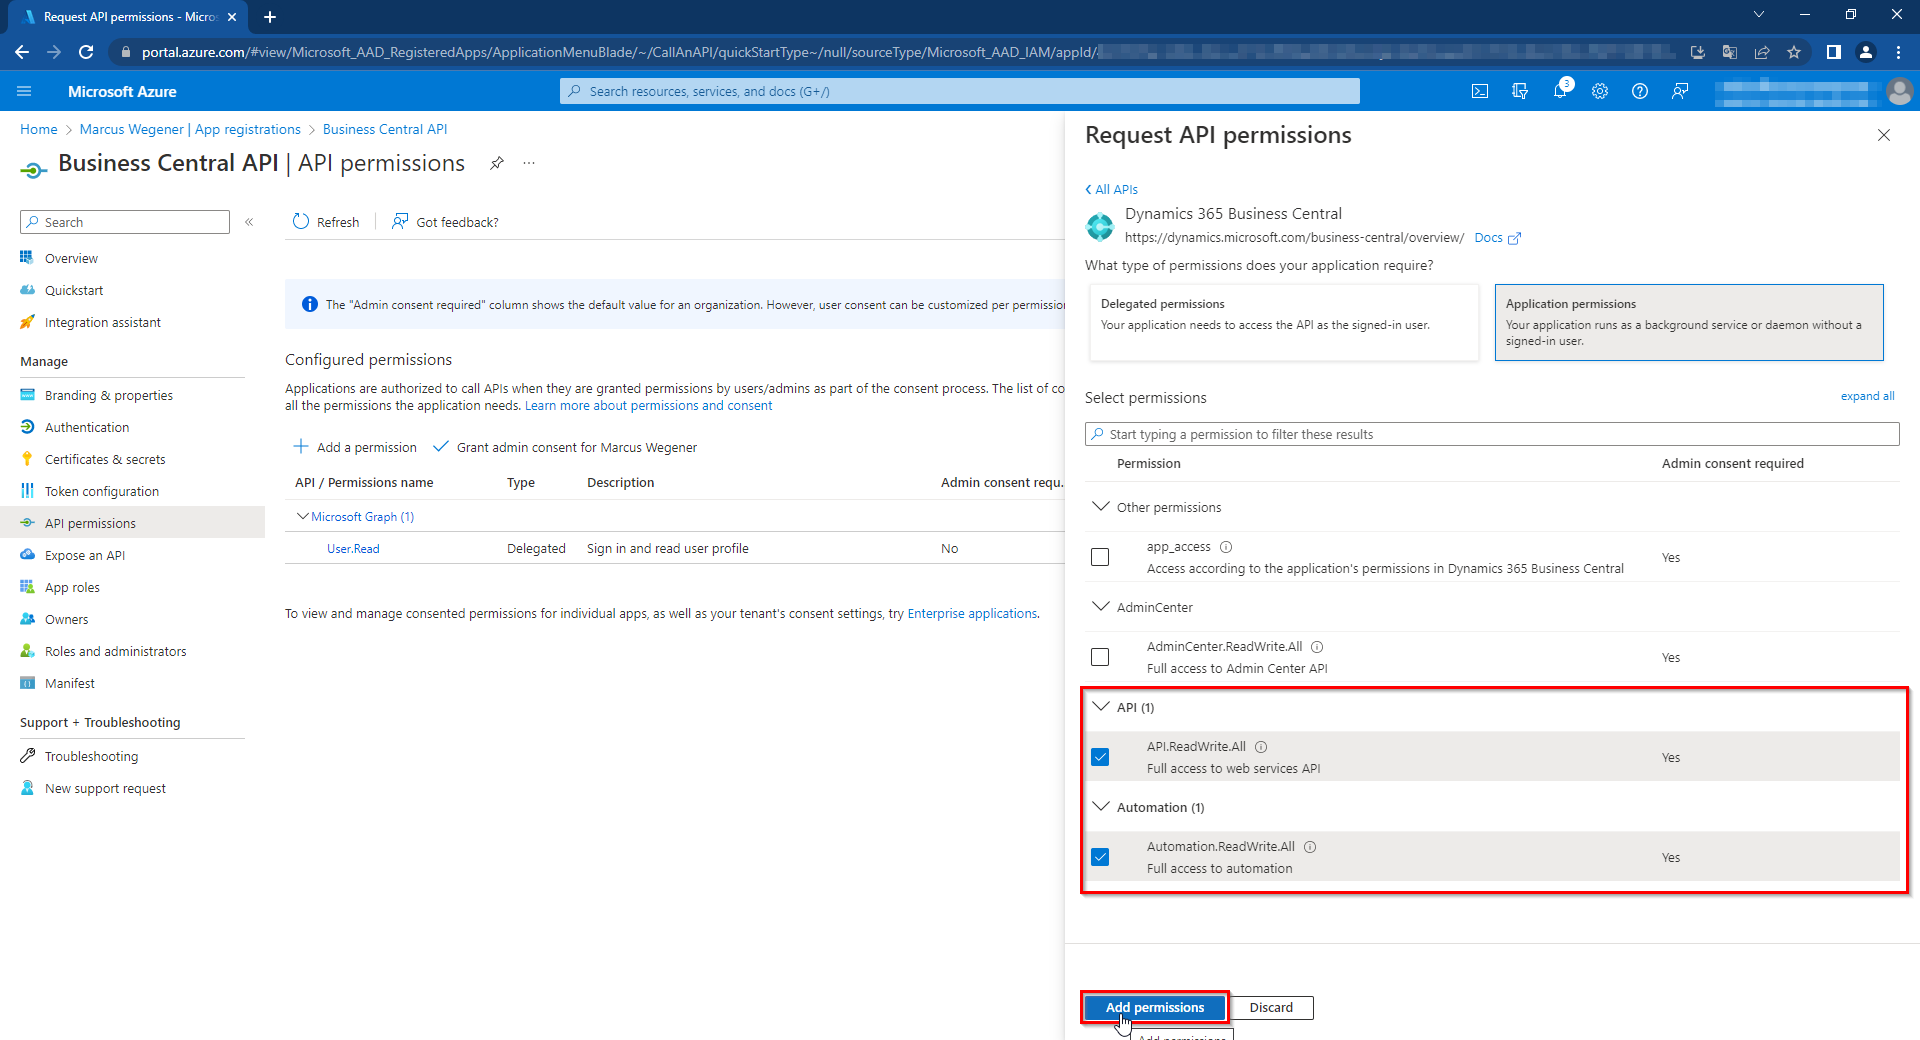
Afterwards we confirm the entries via „Grant admin consent for <tenant name>„.
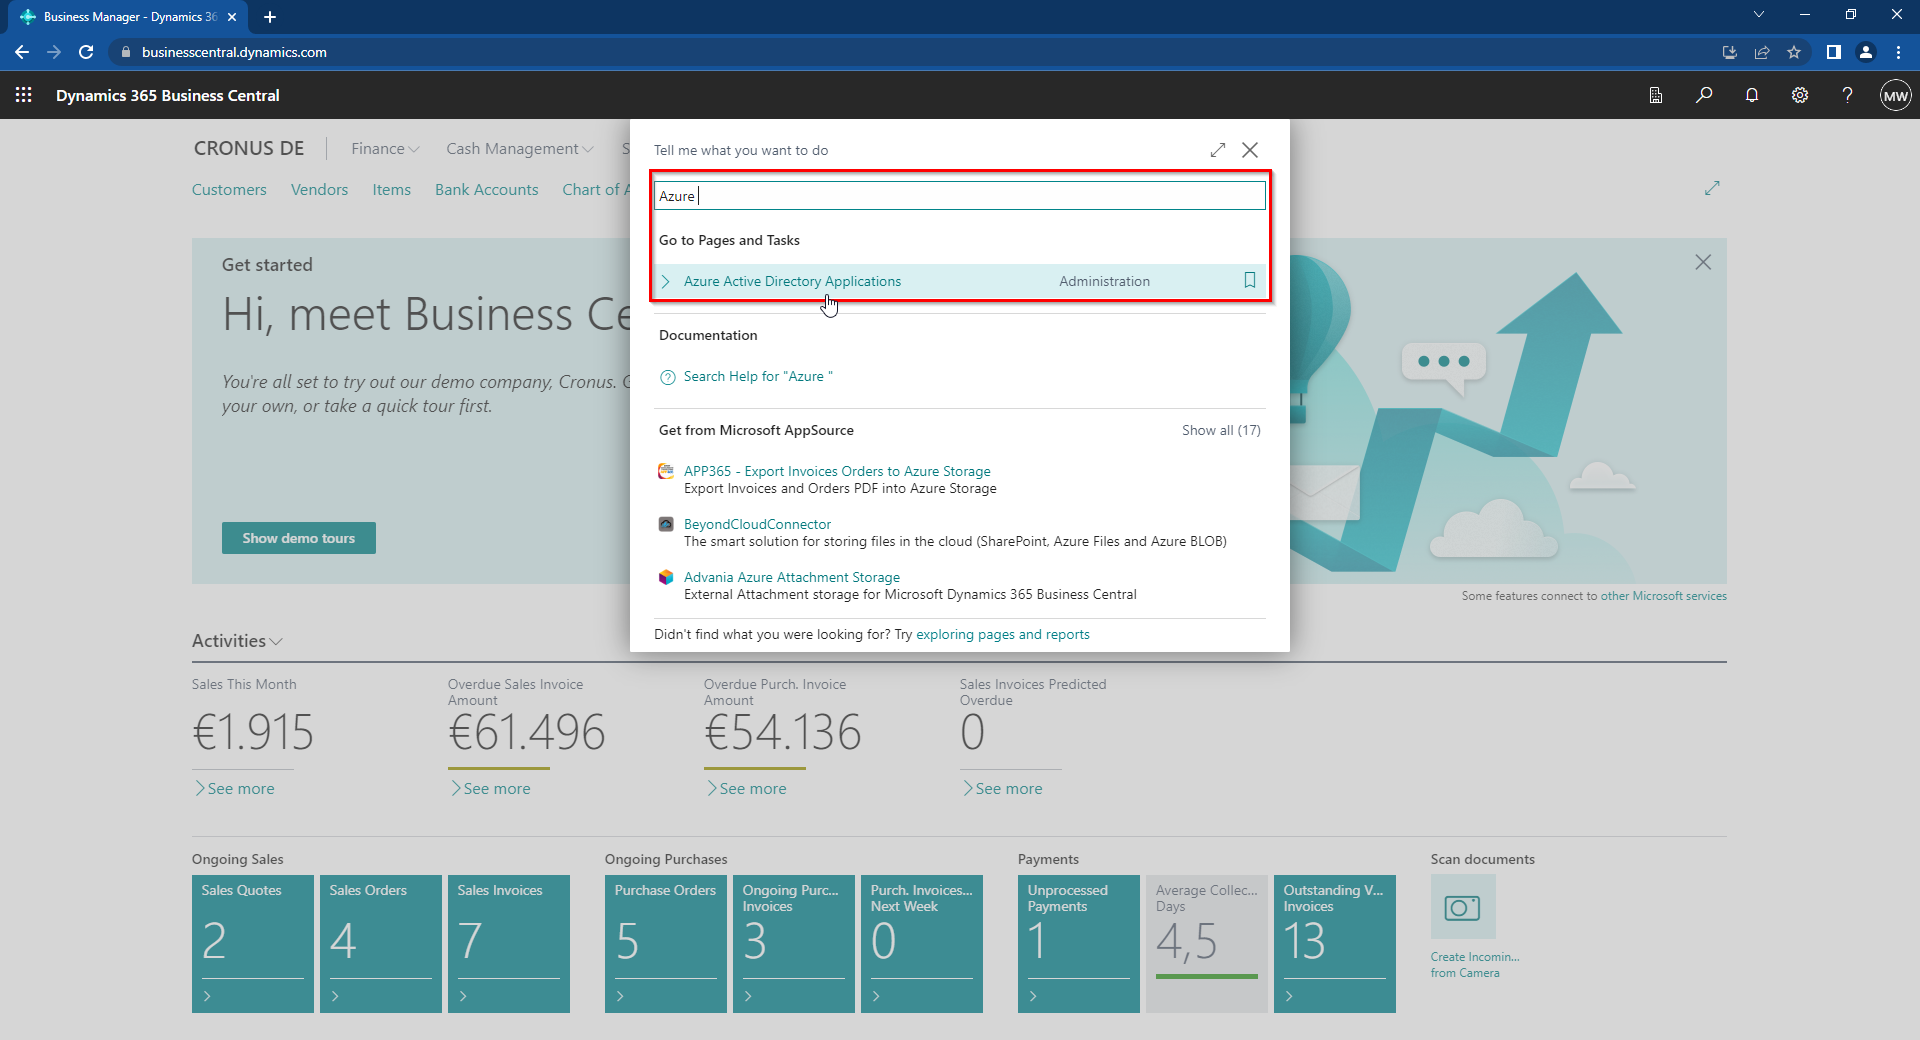
Setting up the Azure AD application in Business Central
Open Business Central and search for Azure Active Directory Applications and open the page.
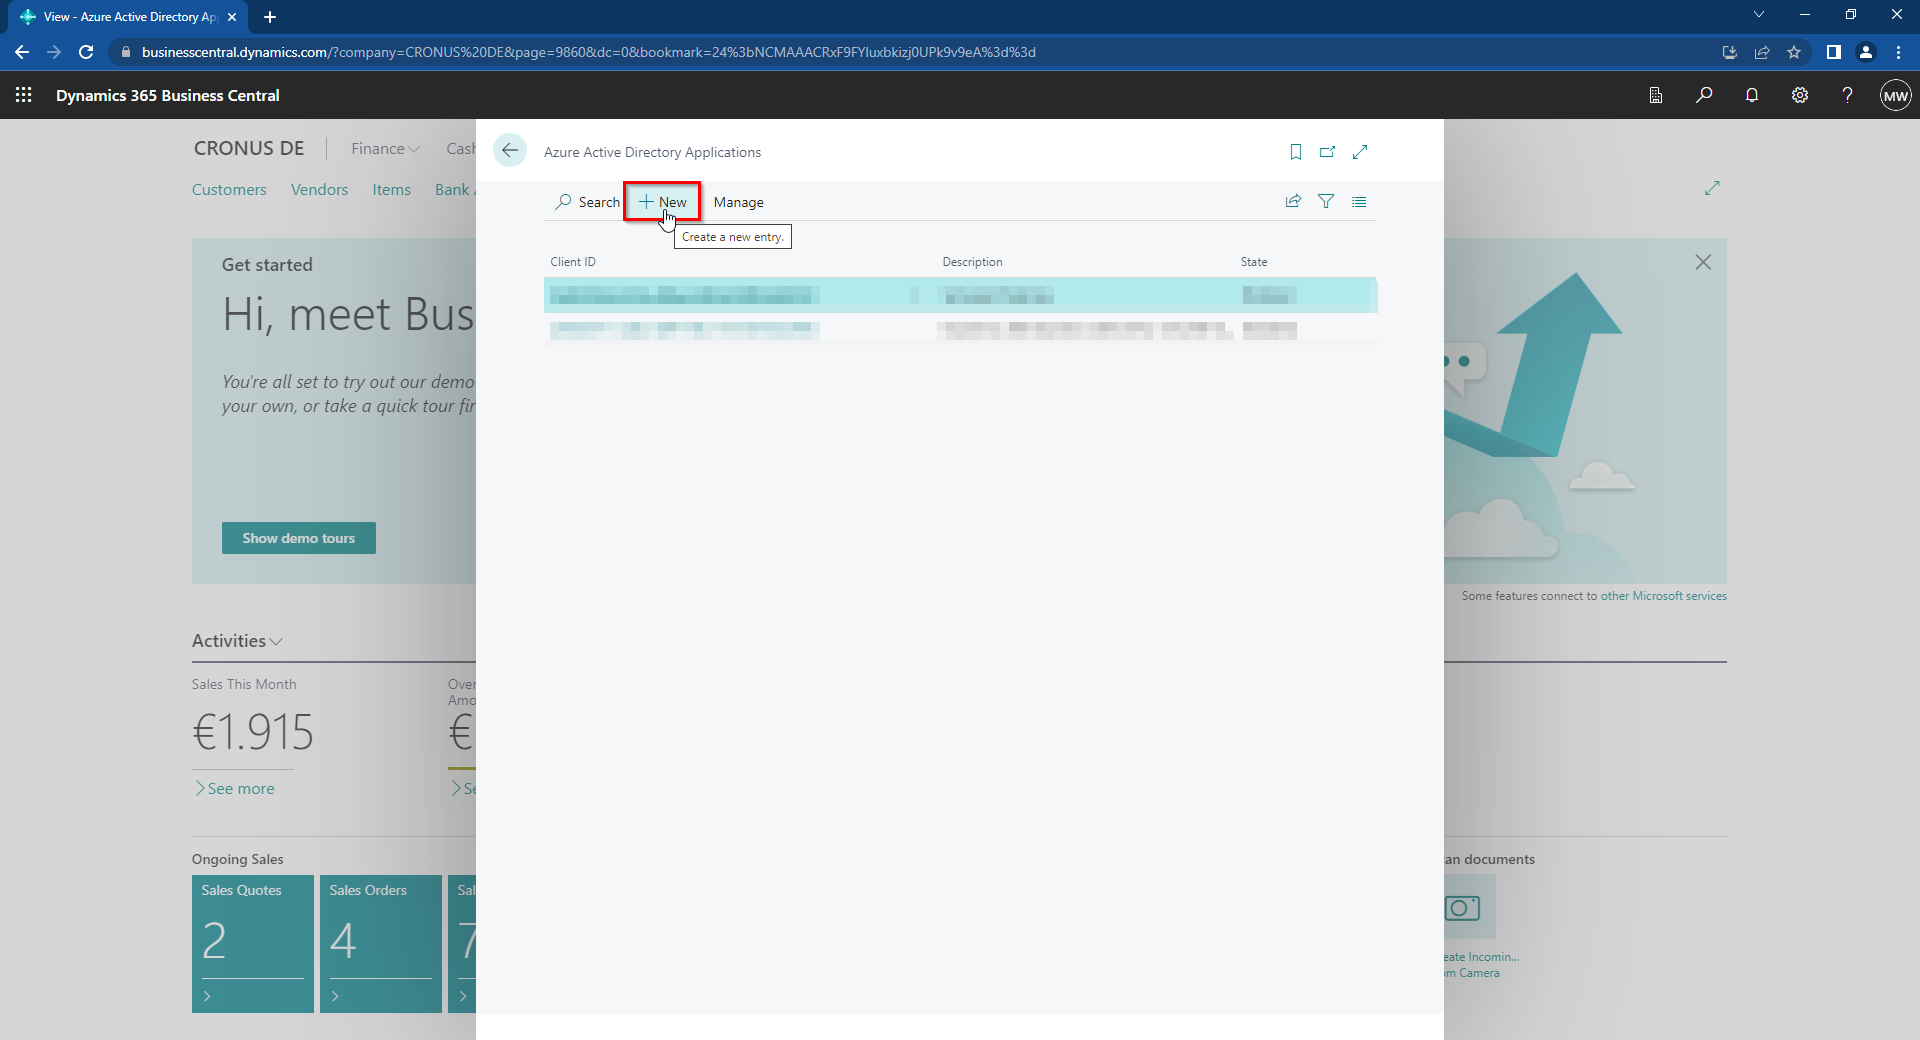
On the page that opens, select New.
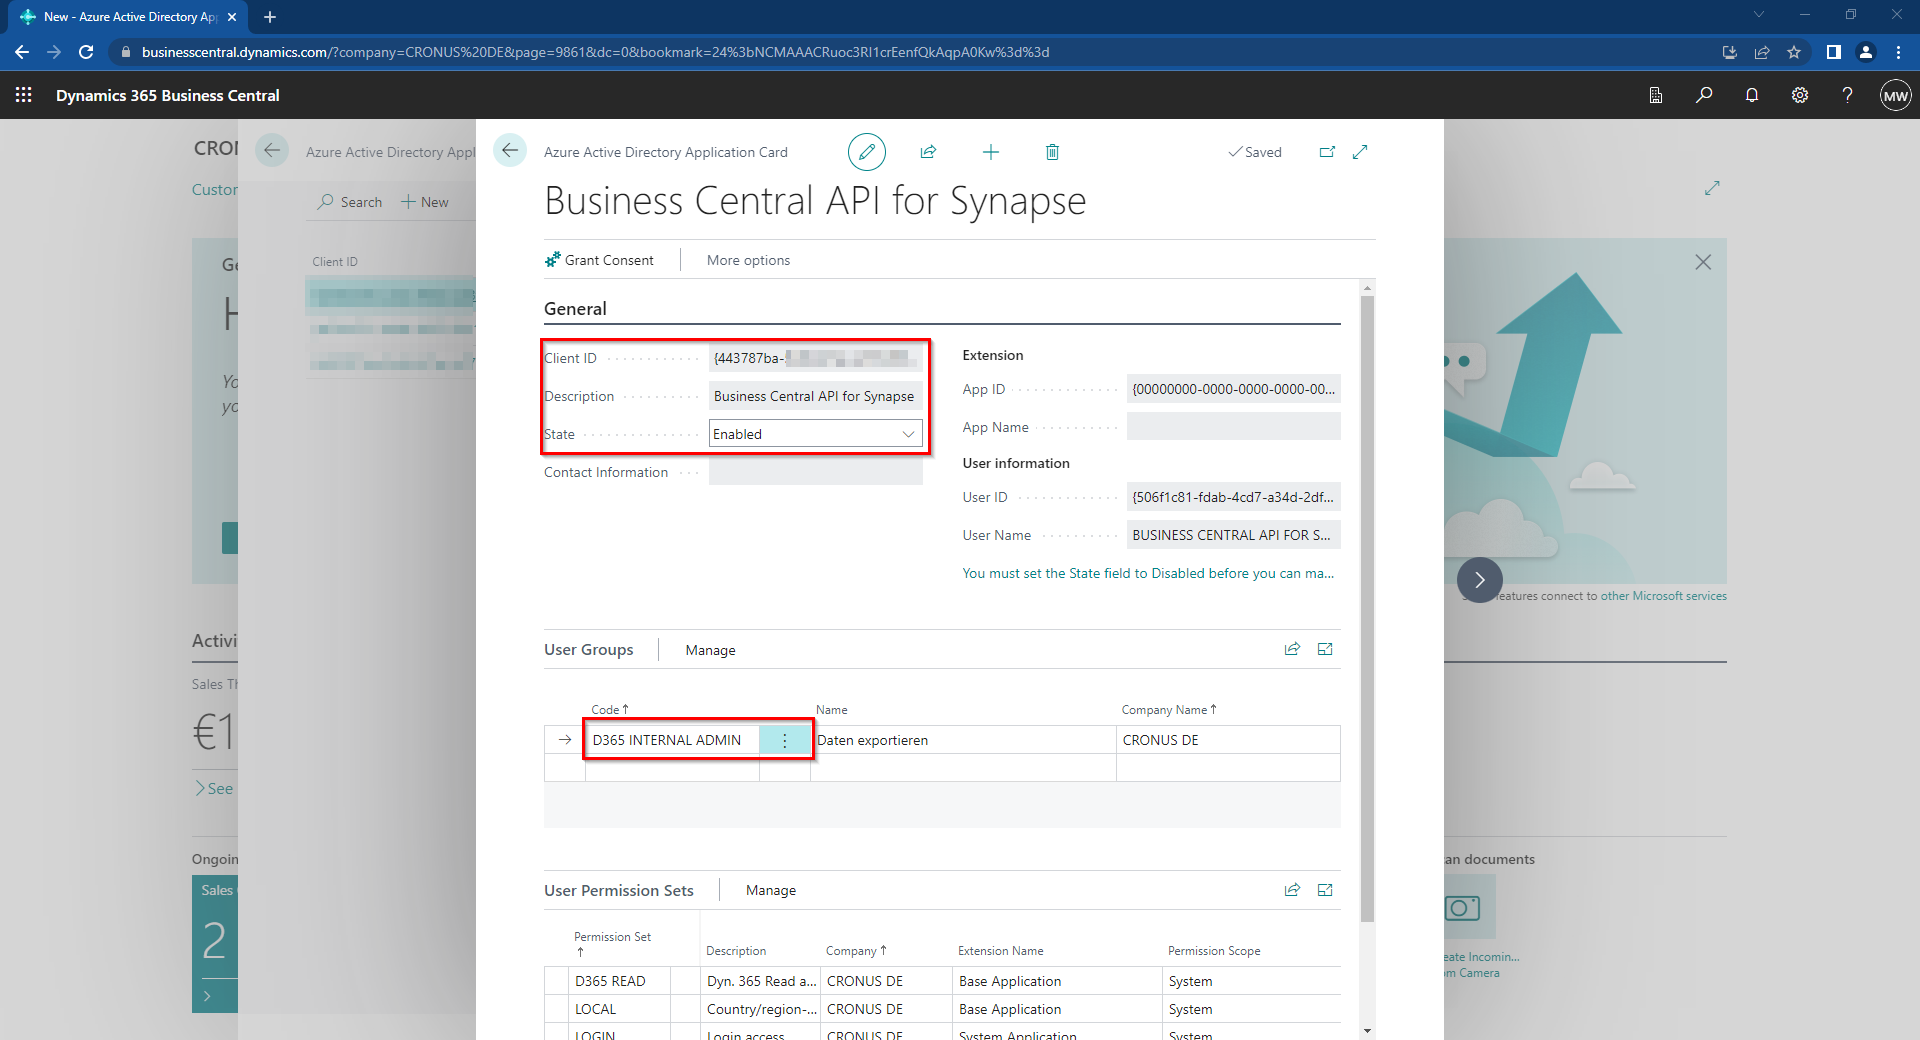
I have entered the following values in the form that opens:
Client ID: the previously saved Application (Client) ID
Description: Business Central API for Synapse
State: Enabled
User Groups: D365 INTERNAL ADMIN (Code)
Setting up the Business Central API connection in Synapse Analytics
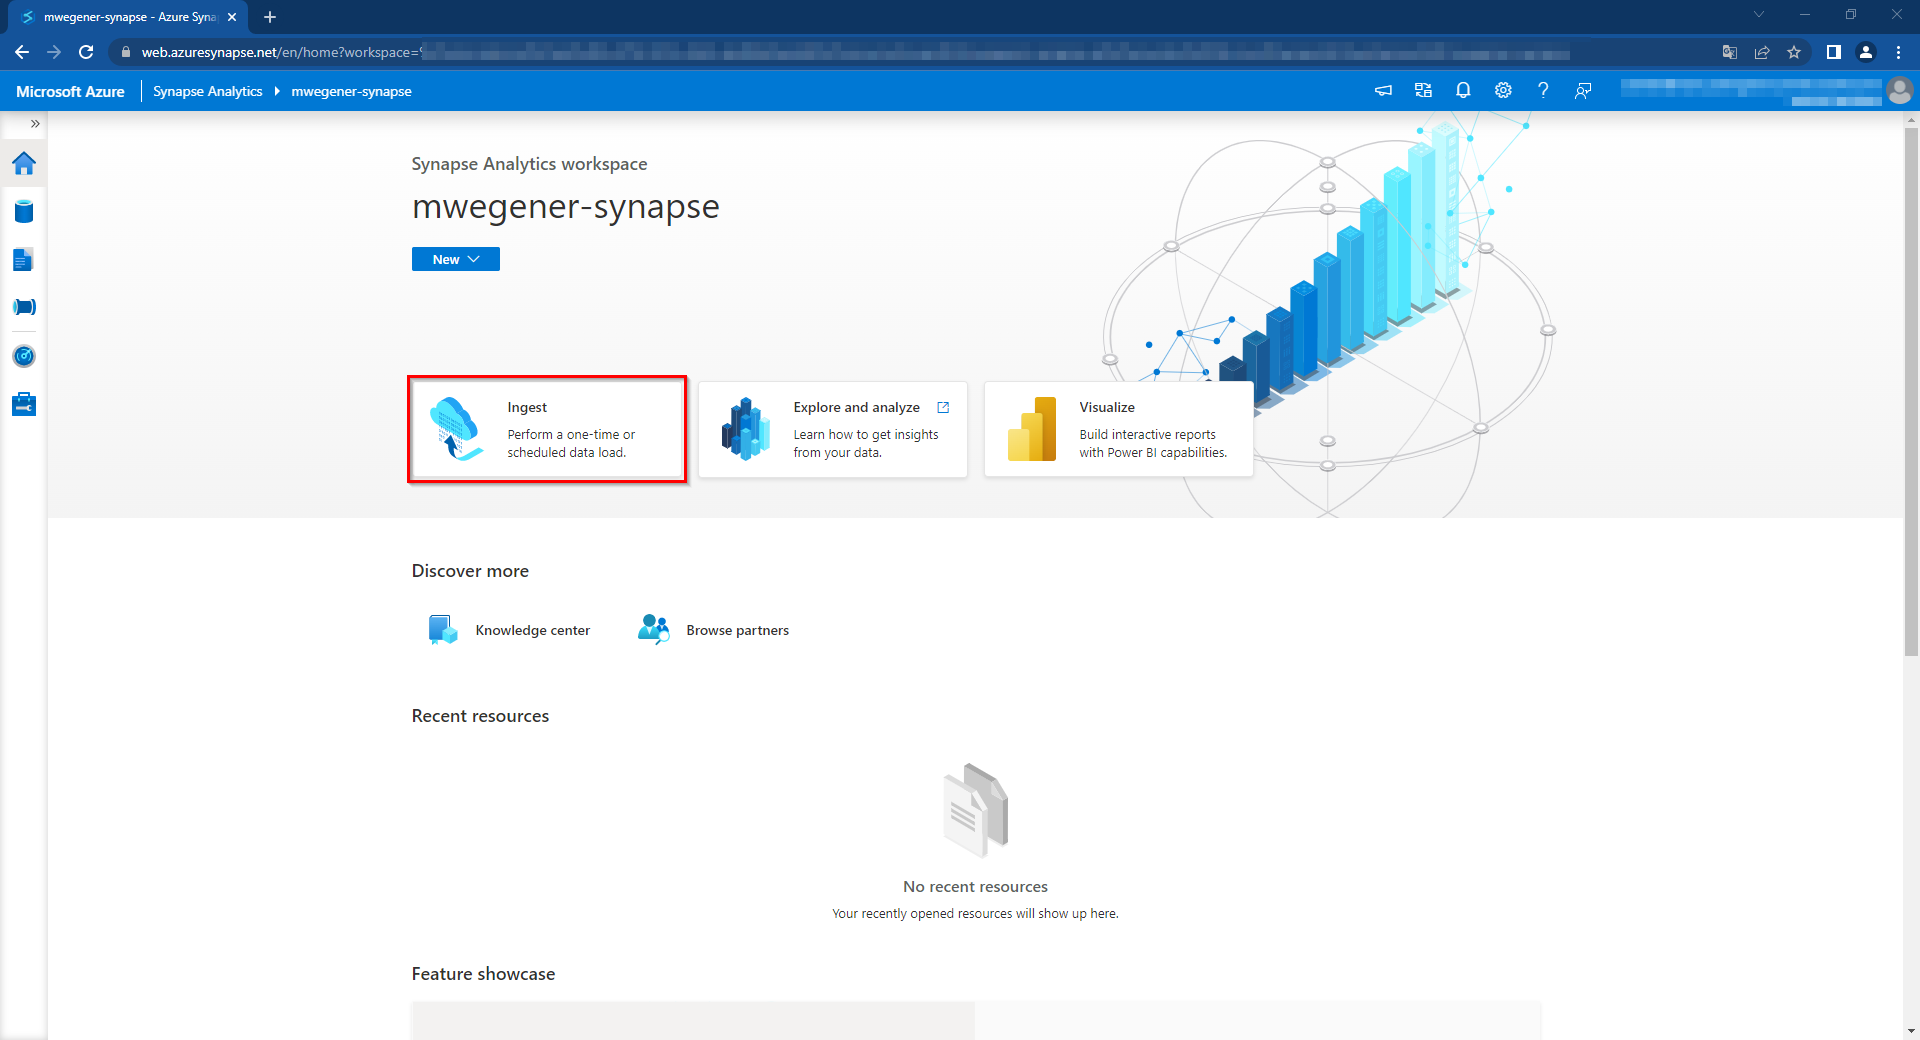
In the Synapse Analytics workspace, we start in this example by clicking the Ingest button.
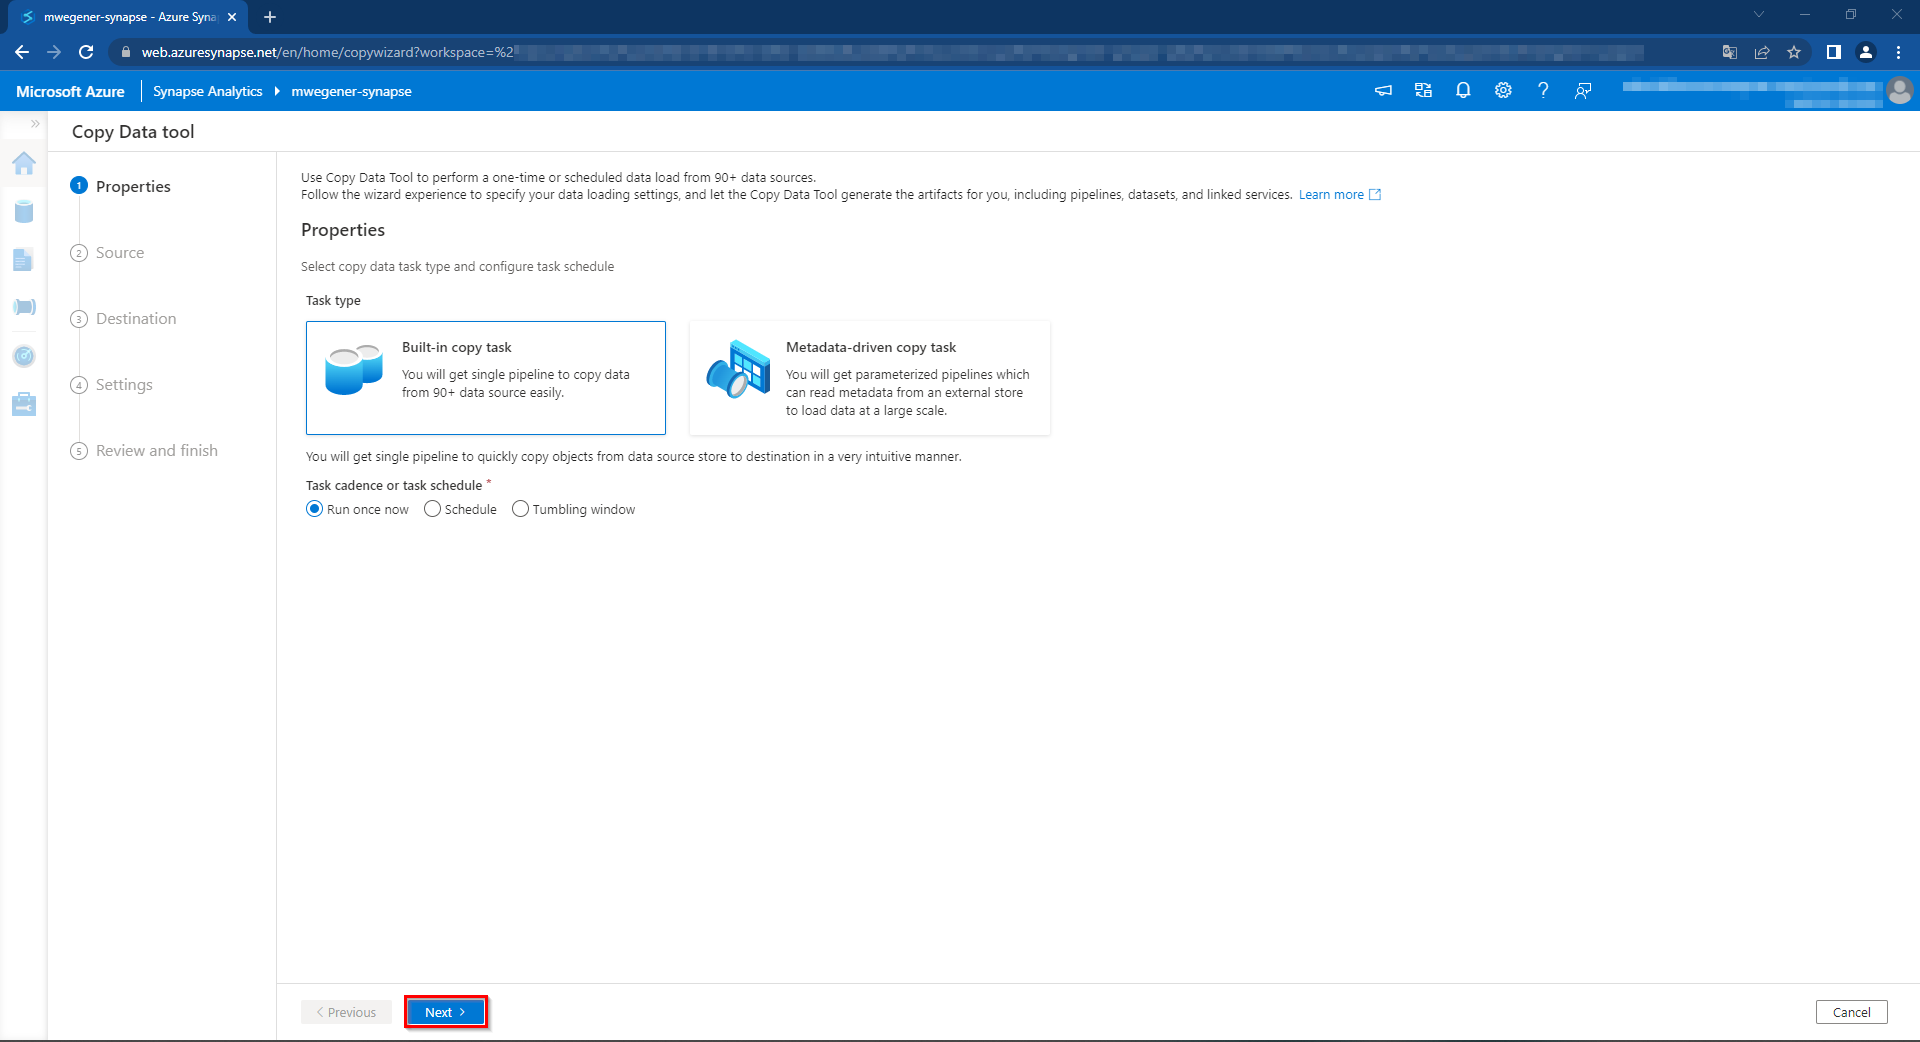
In the Copy Data tool dialog, in this example, we accept the default with „Built-in copy task“ and „Run once now“ and click „Next„.
As source type for the source data store we choose OData.
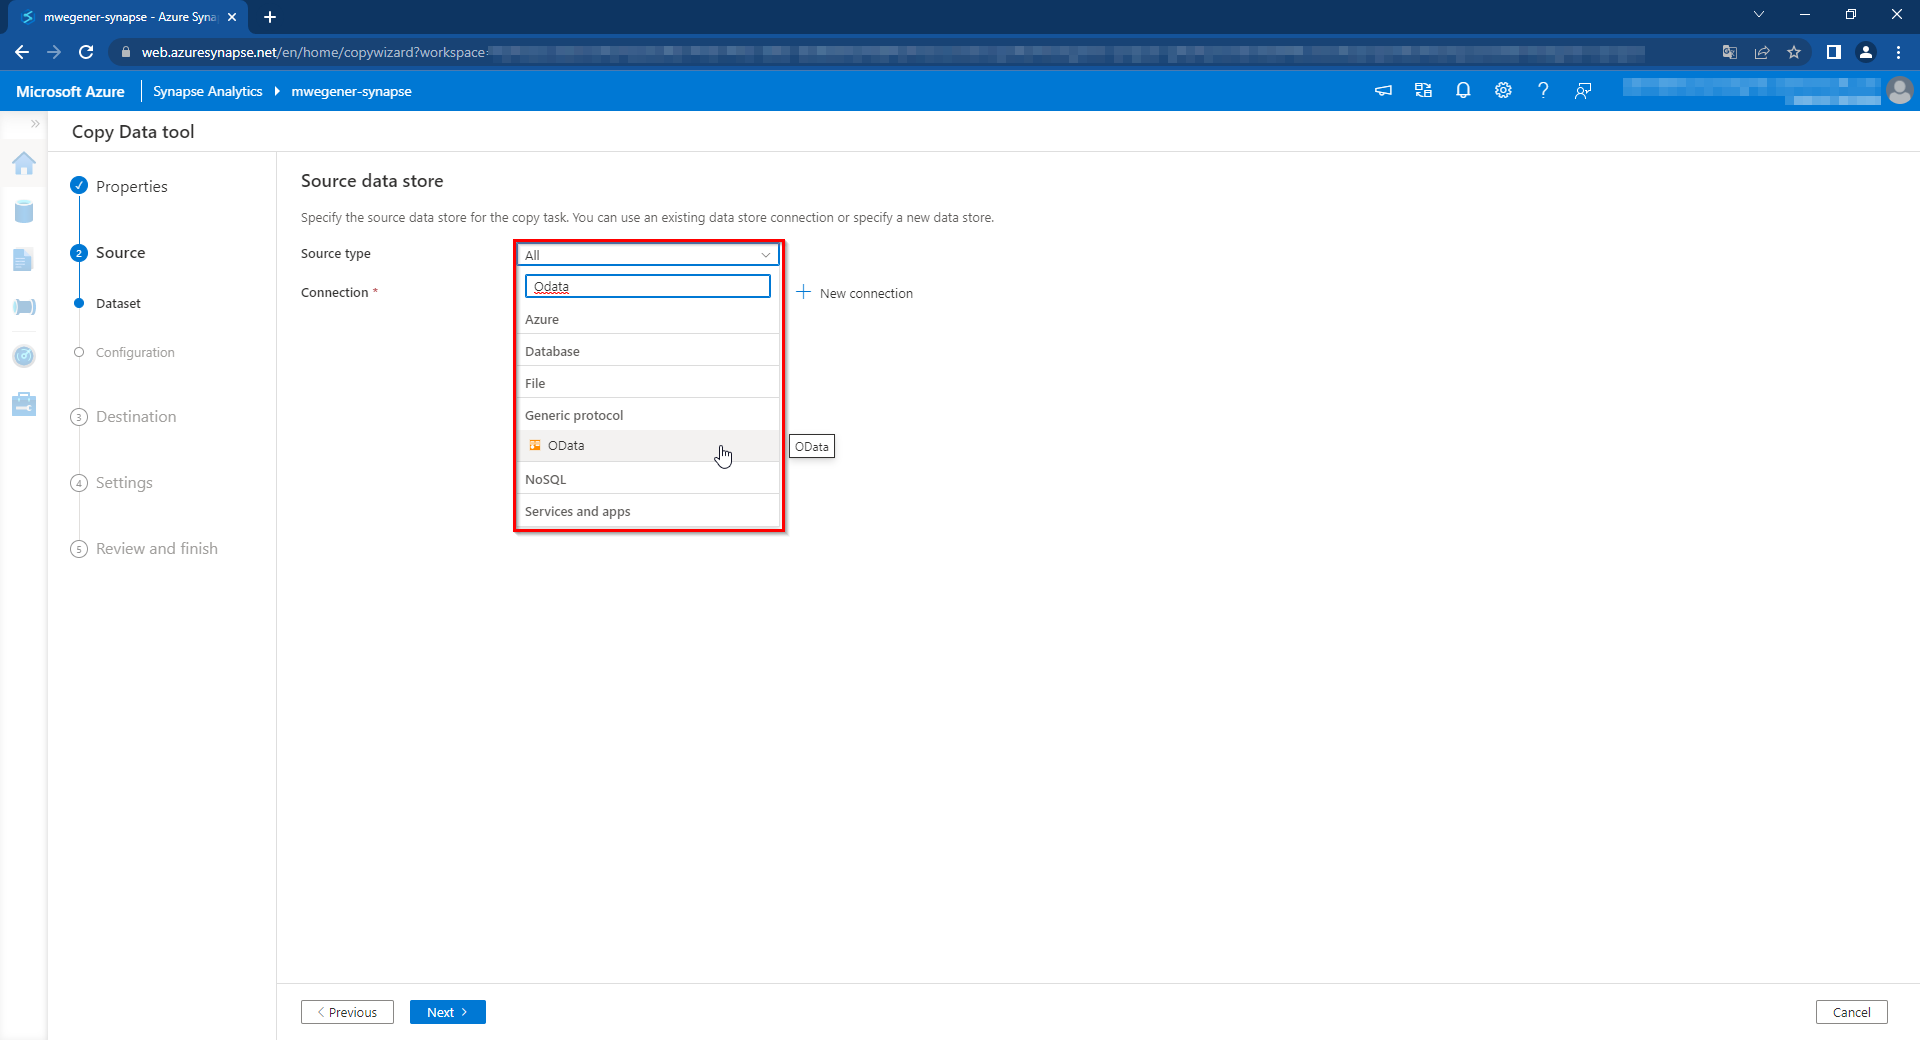
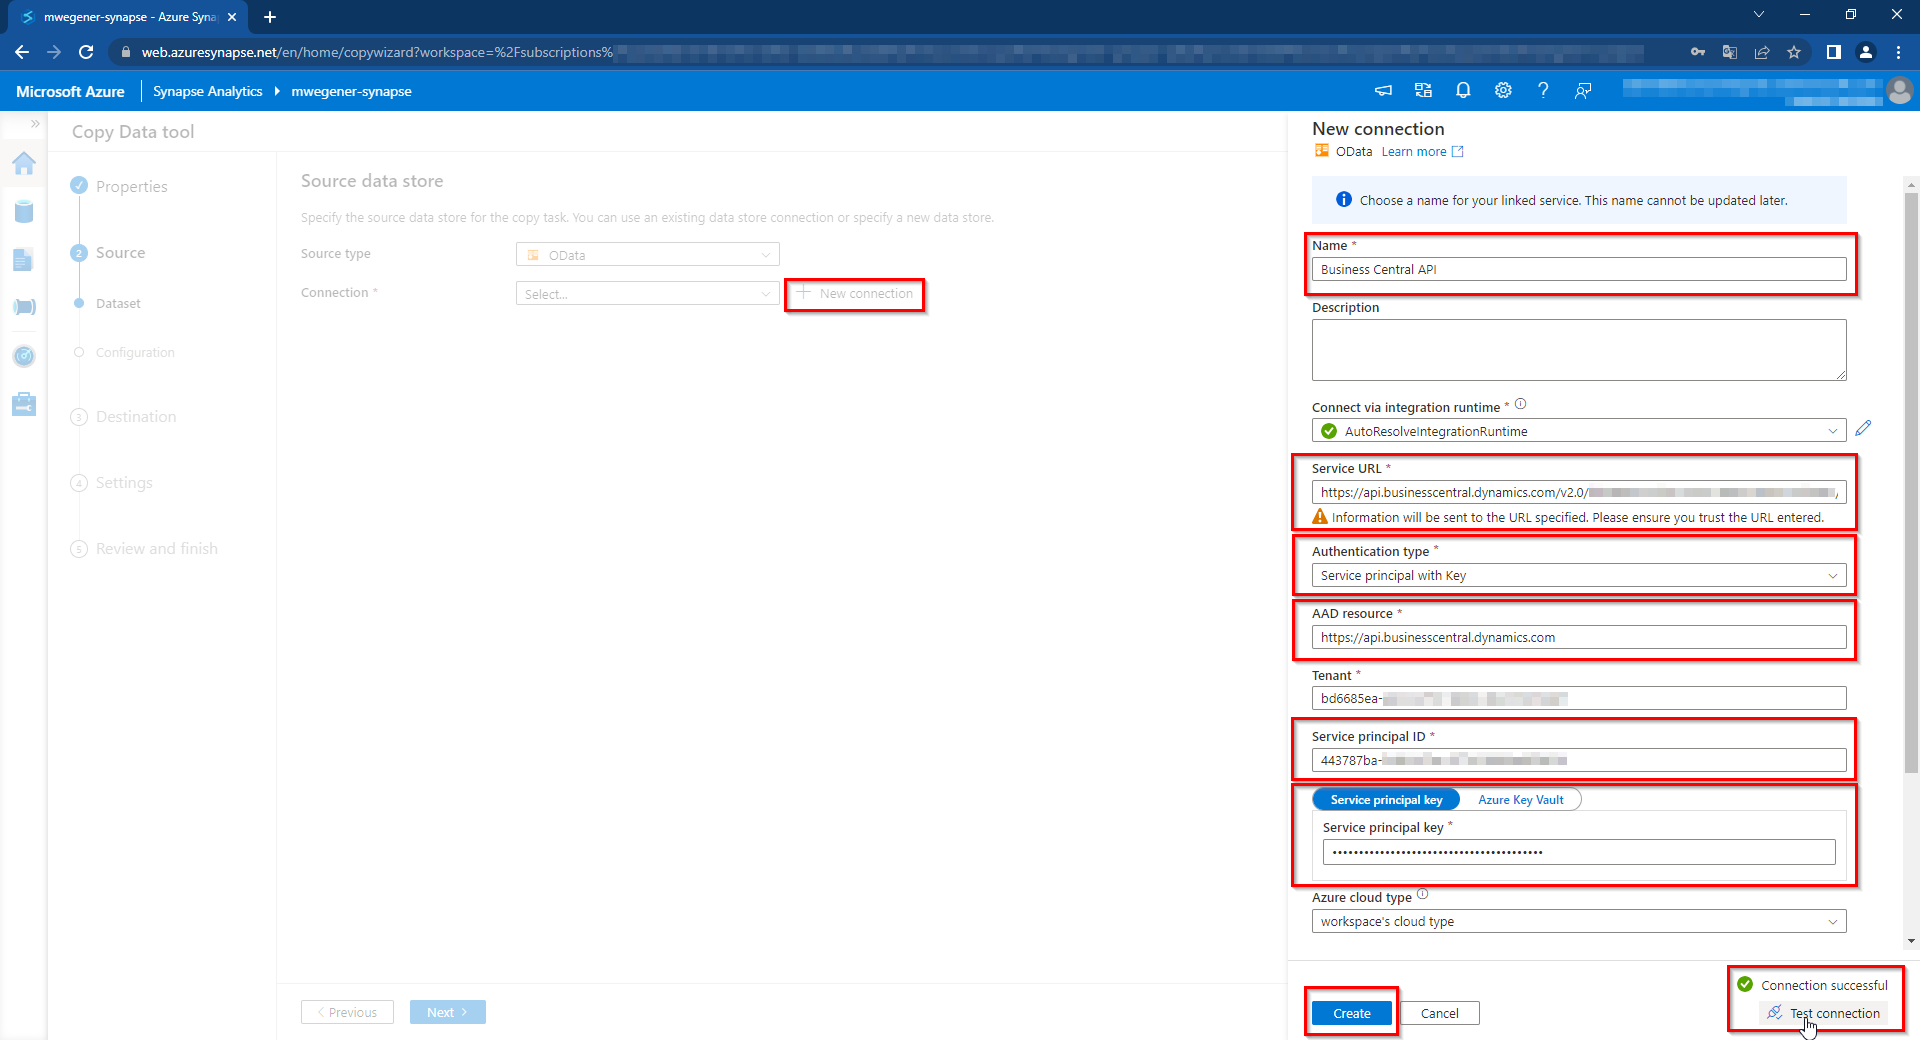
Then we create a connection via „New connection“ with the following settings.
Name: Business Central API
Service URL: https://api.businesscentral.dynamics.com/v2.0/<tenant id>/production/api/v2.0/
Authentication type: Service principal with Key
AAD resource: https://api.businesscentral.dynamics.com
Tenant: the previously saved Directory (tenant) ID
Service principal ID: the previously saved Application (Client) ID
Service principal key: the previously saved client secret key value
The settings can be checked via „Test connection“ and then accepted with „Create„.
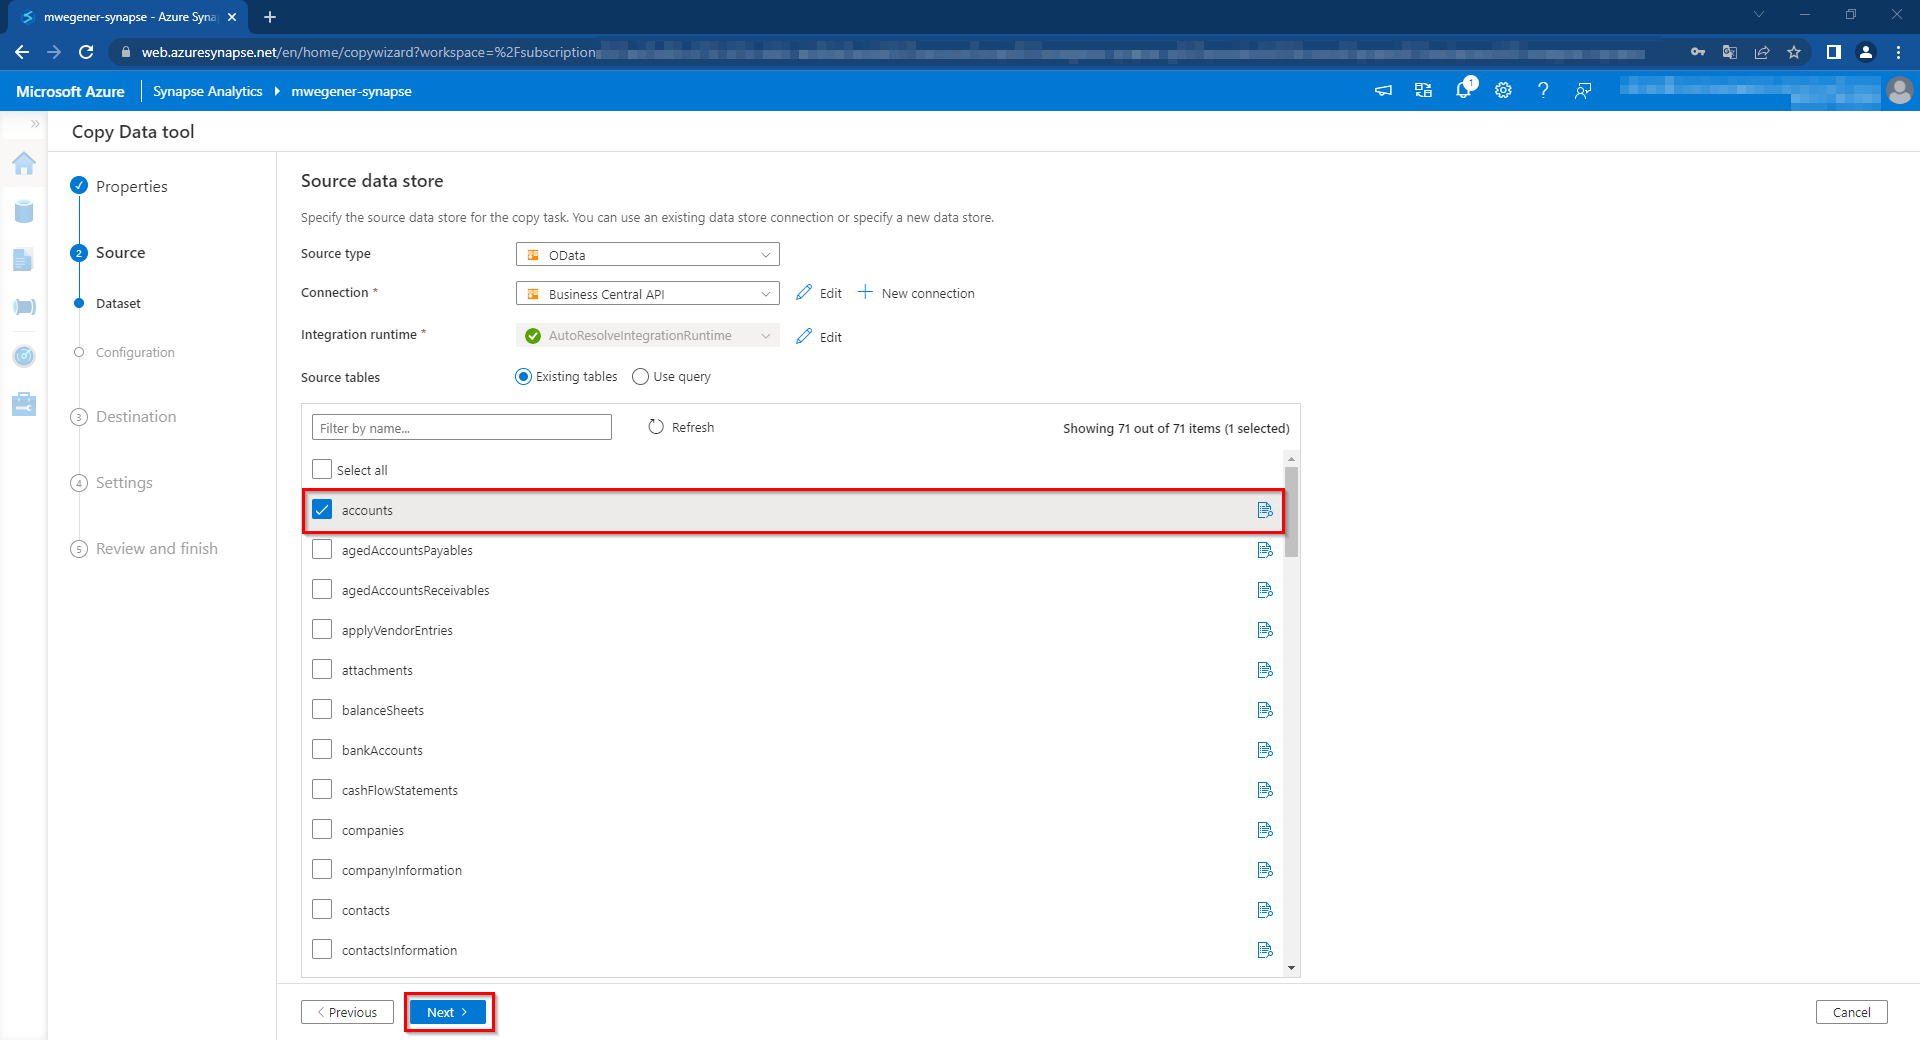
With the successful connection we can now select the existing tables (entities) and set up further copying to any source.
I hope this little tutorial helped you to set up a connection to the Business Central API and would be happy if you leave a short comment about it. Also, please let me know if you would recommend a different approach.
More details about the different settings and their meaning can be found in the official Microsoft documentation. Using Service-to-Service (S2S) Authentication
In the meantime, I found another blog post by Arend-Jan Kauffmann „Service to service authentication in Business Central 18.3 – How to set up“ that also describes the needed setups in Azure and Business Central.
Thank you, that helped us a lot!
Something to consider is that you have to modify the name of the environments in the service URL of your example if your environment name is not „production“.