Digitization, IoT and sensor data are currently on everyone’s lips. So in this post, I want to show you how to create your own small sensor and send its data to Power BI.
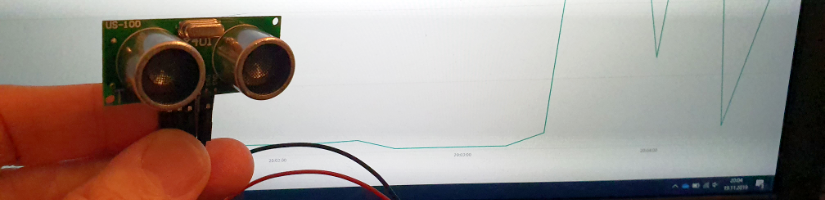
The components for the sensor are quite cheap. You get a WeMos D1 mini for less than 7€ and the ultrasound module US-100 for less than 4€.
Of course, you can also use any other ESP8266 / ESP32 board or ultrasound module (e.g., HC-SR04). However, the ultrasound module US-100 has the advantage that it can also be operated with 3.3V and has a temperature sensor.
Create a Power BI Streaming dataset
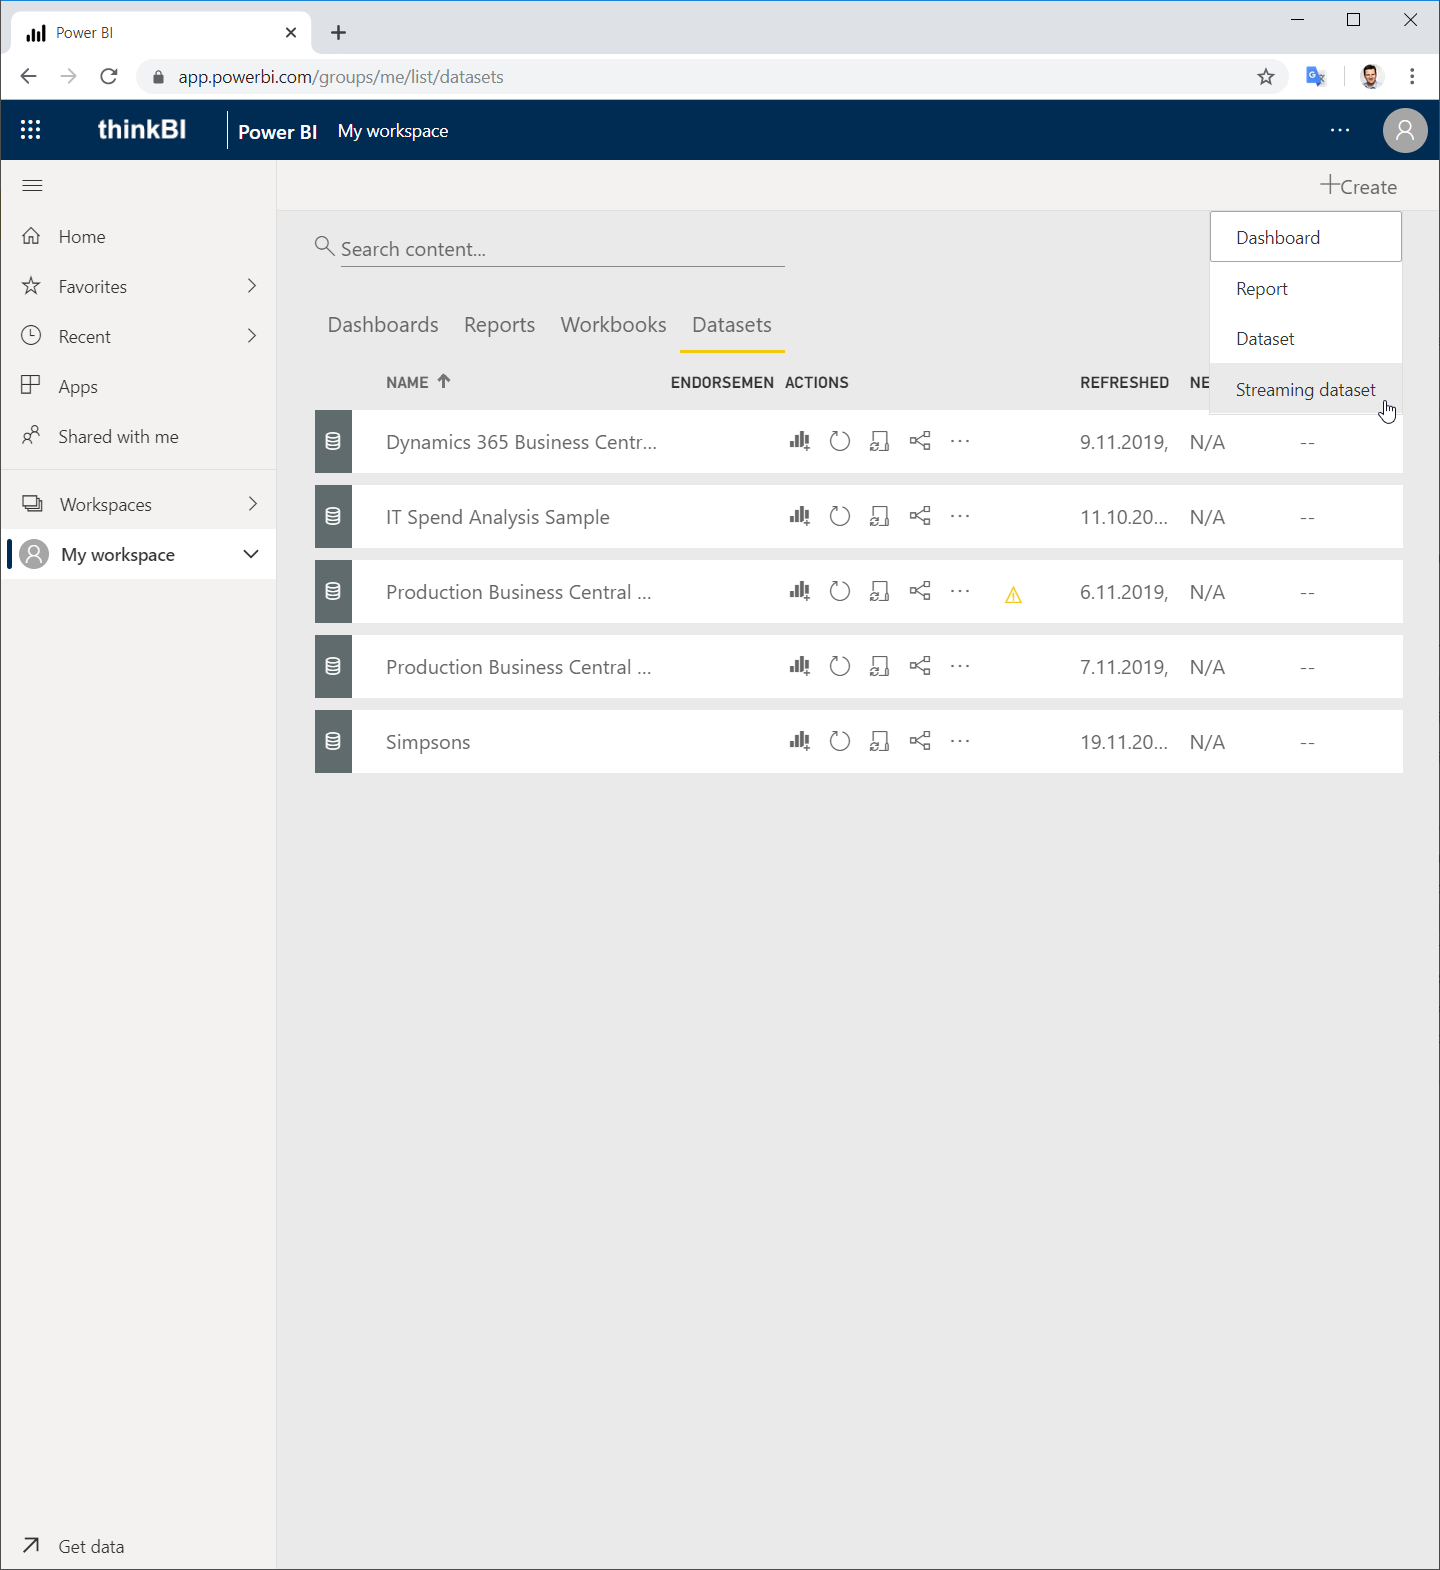
First, we need to create an endpoint for our sensor data in Power BI. To do this, create a Streaming dataset in your workspace.
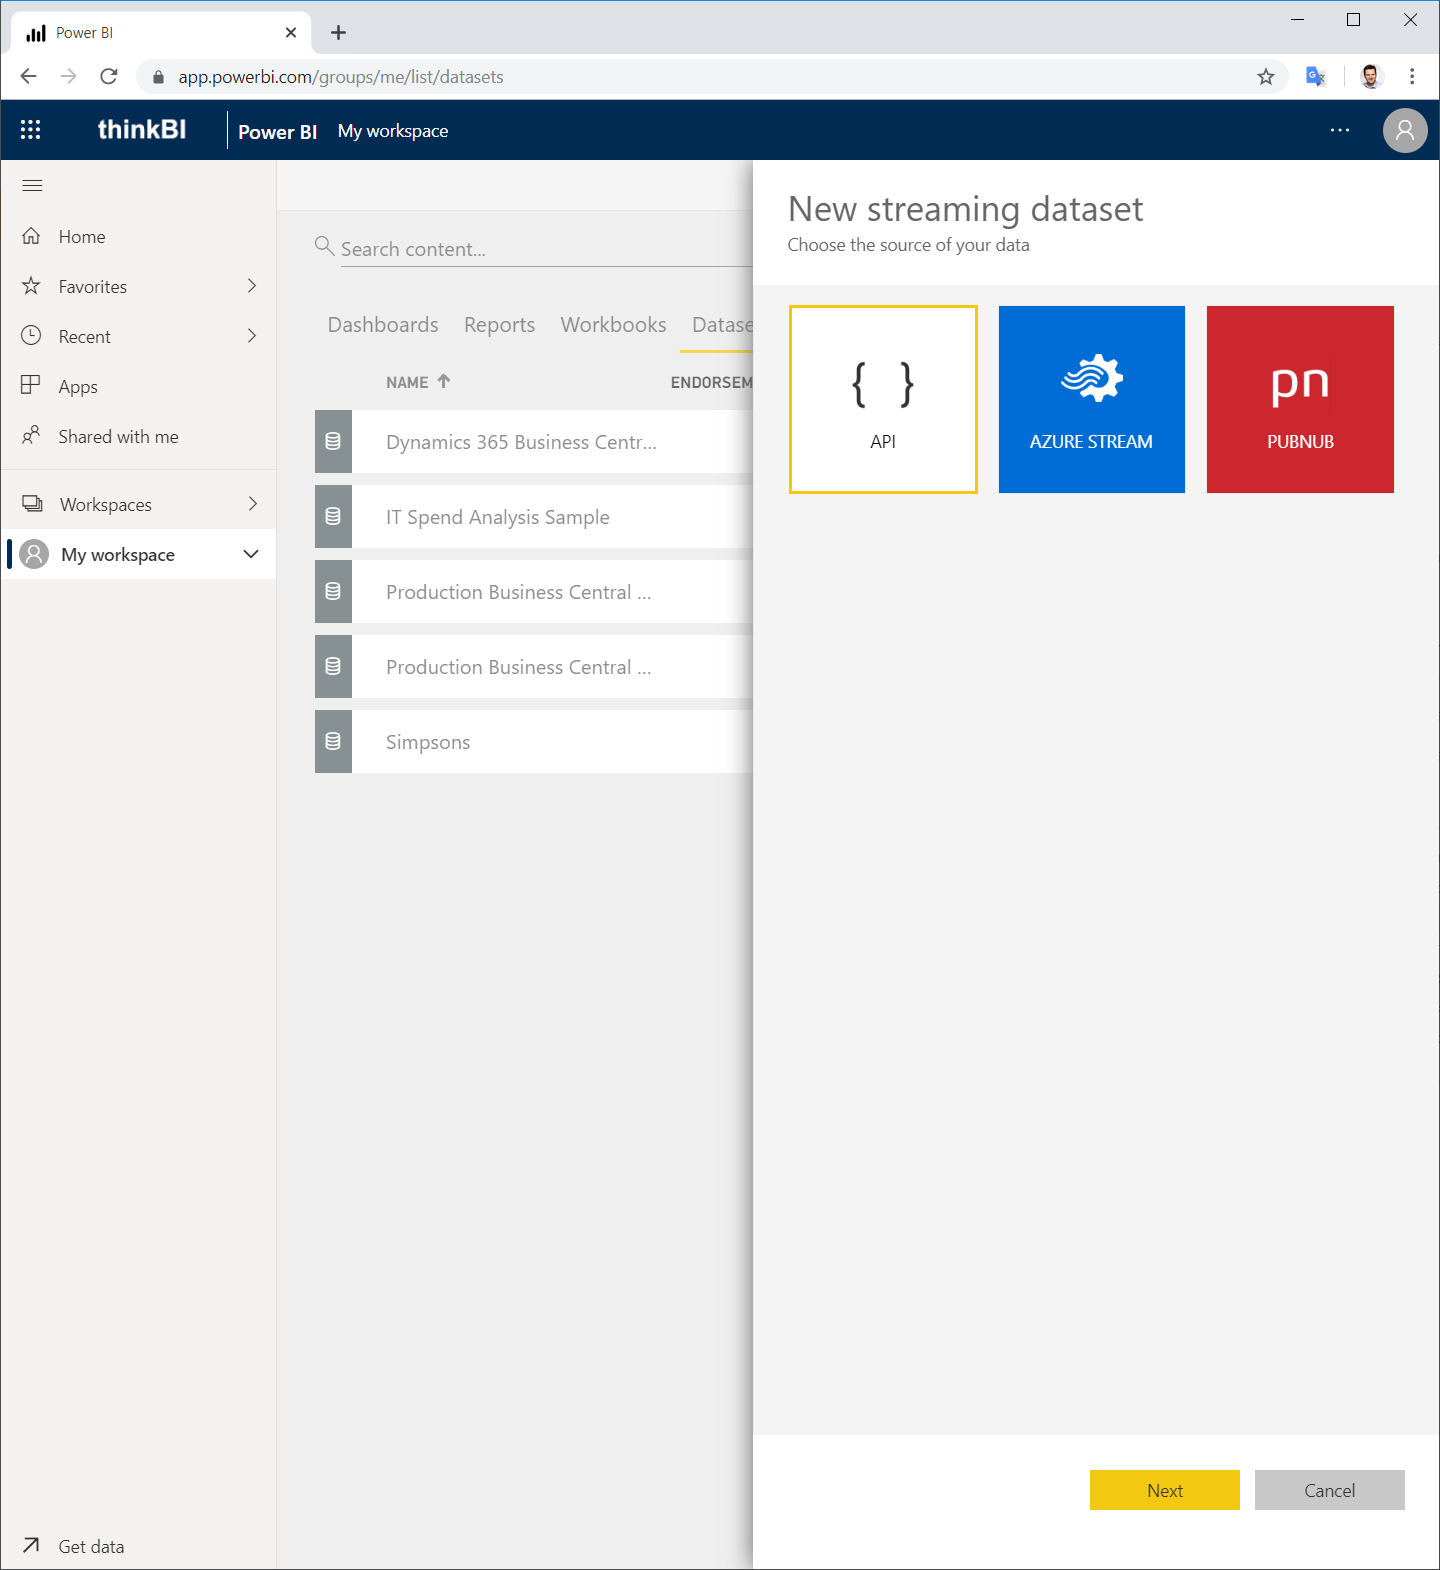
As the source, select API and click Next.
In the next step you name the streaming dataset and define the data structure. In this example, we will create a DateTime column DateTime, a Distance column of the Number data type, and a Temprature column of the Number data type.
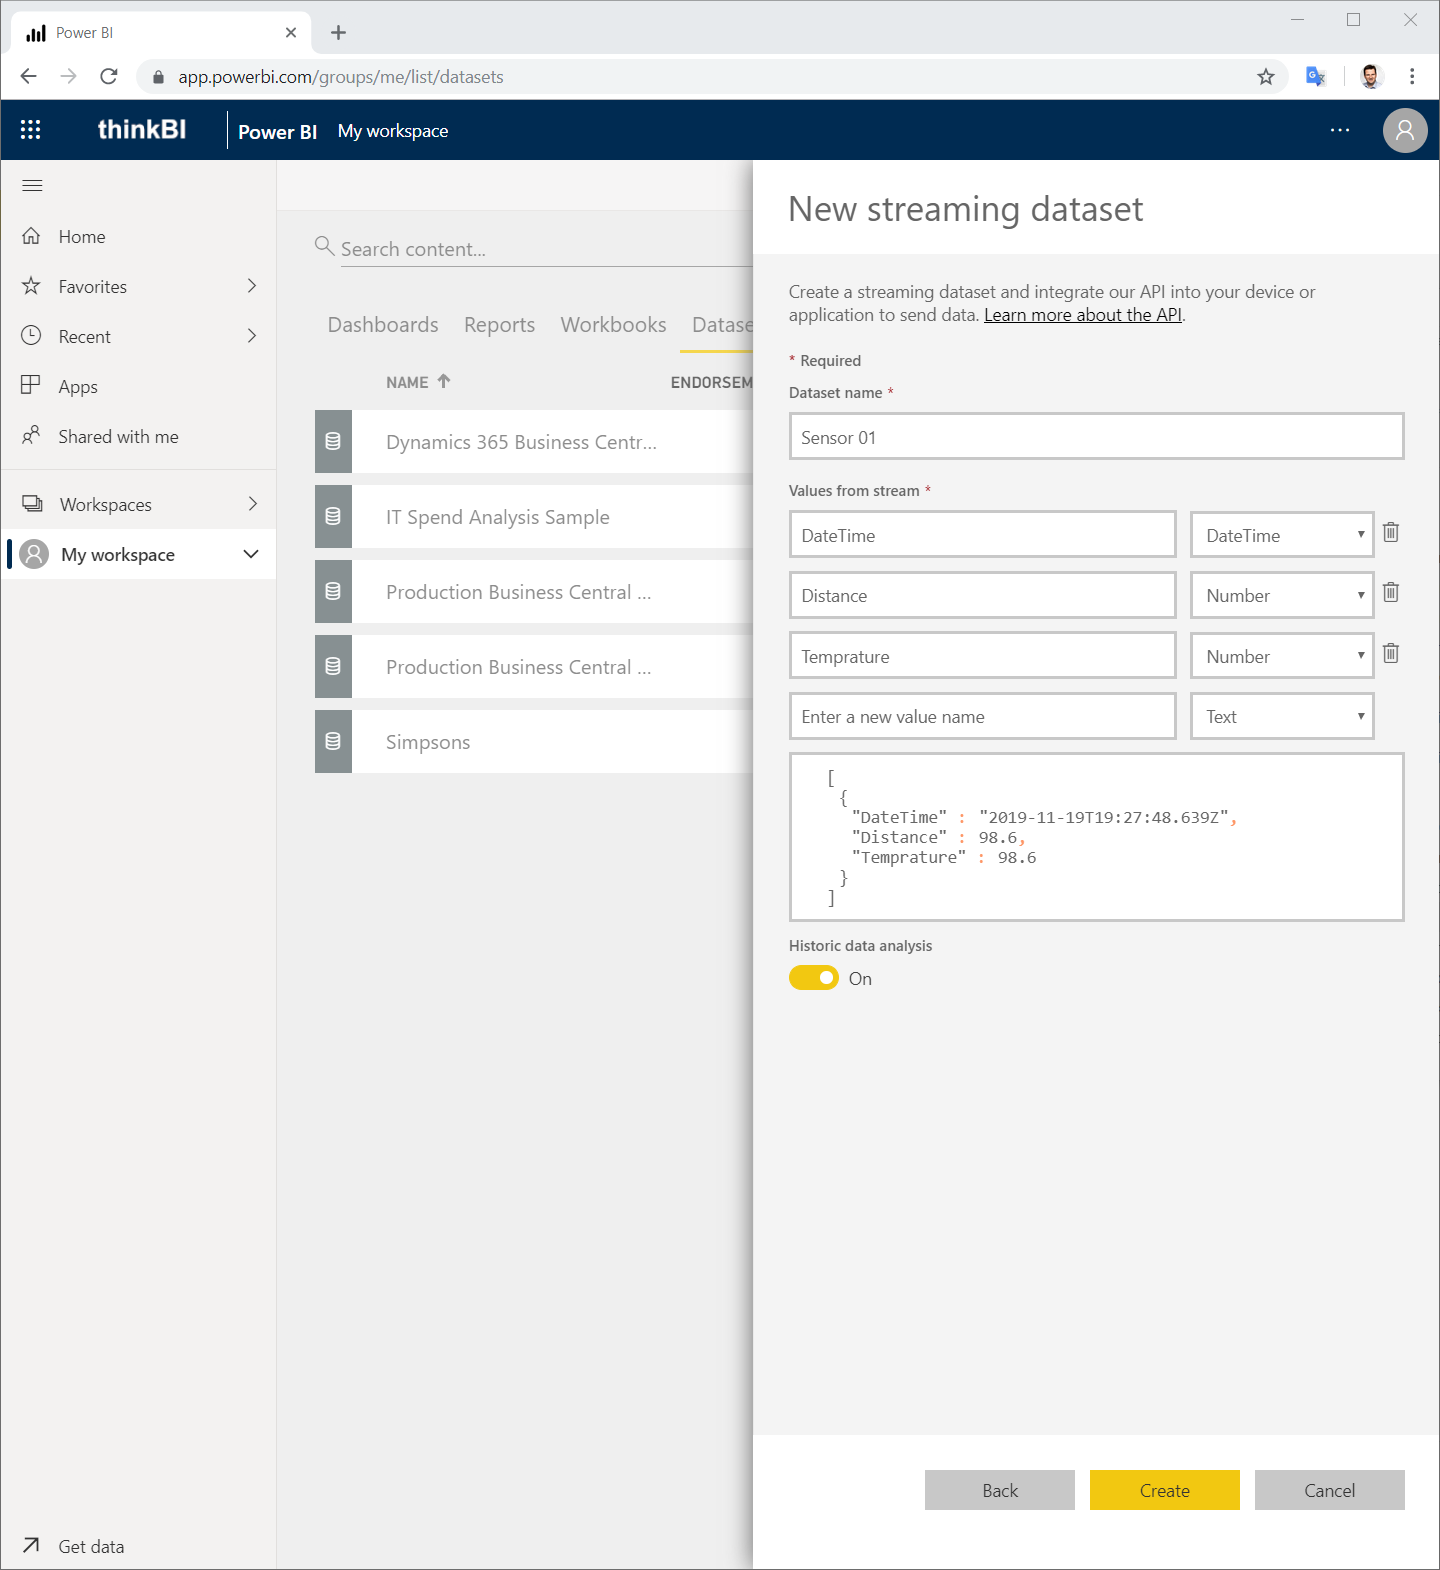
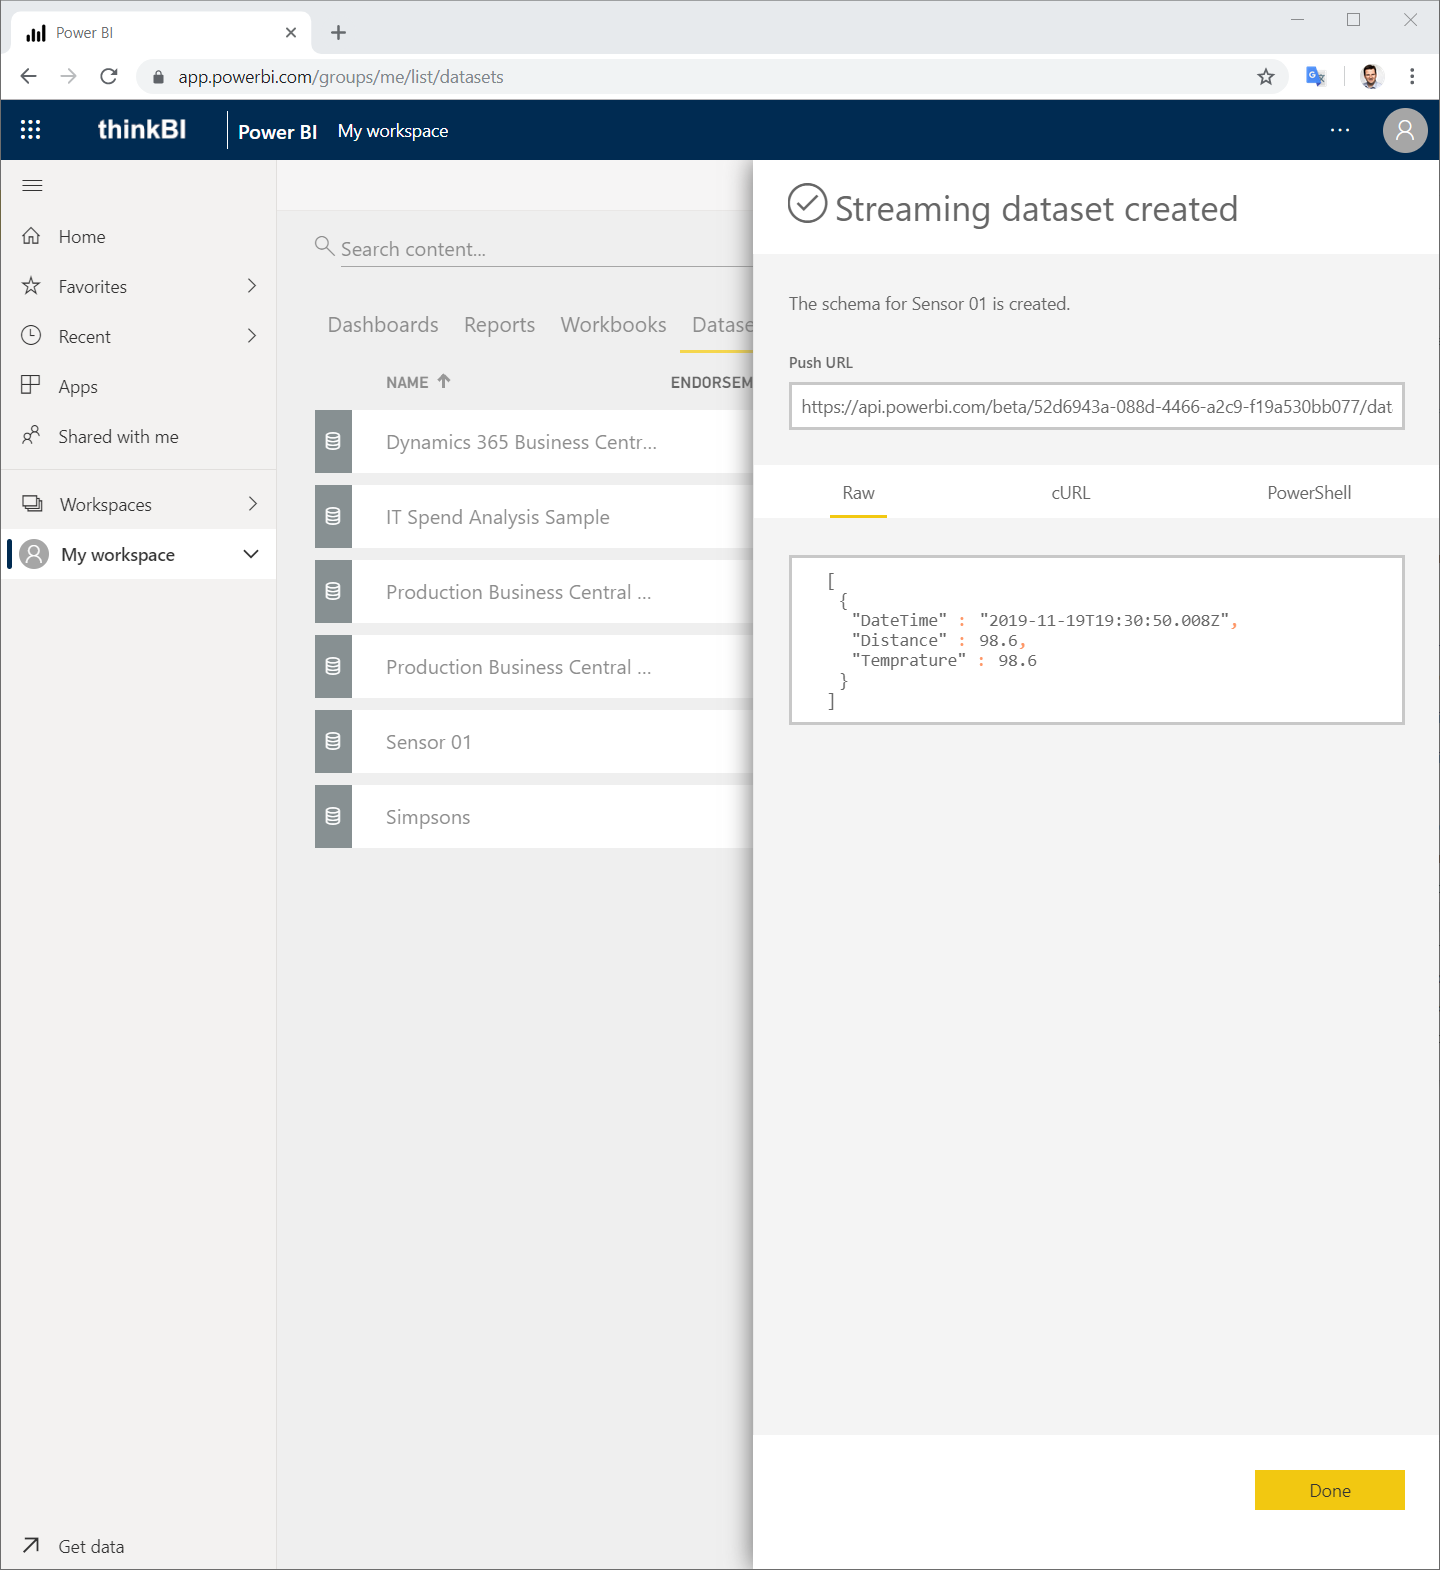
After you choose Create, the streaming dataset is created. In the following dialog you will get the Push URL, which you can use to send data to the endpoint. Copy the URL for later use.
Assembly of the sensor
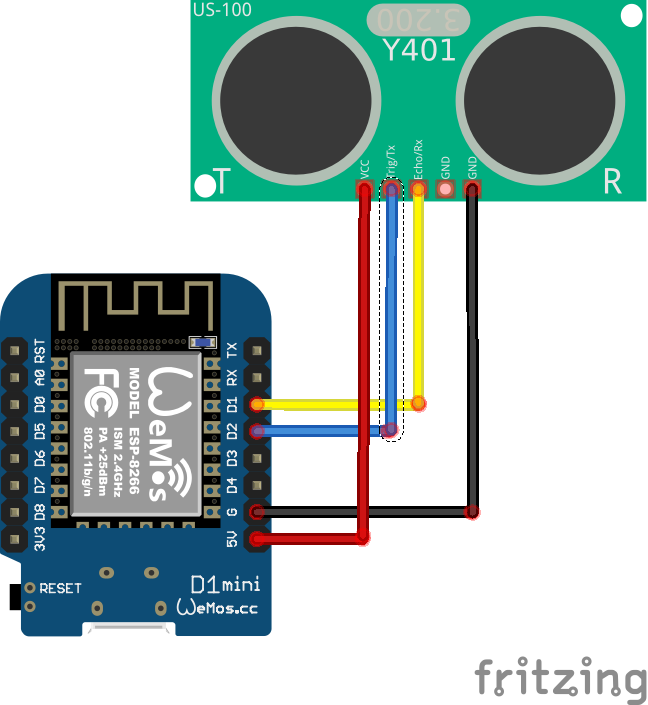
The connection between the US-100 ultrasound module and the WeMos D1 mini is as follows:
VCC - 3,3 / 5V
GND - GND
D1  - ECHO
D2  - TRIG
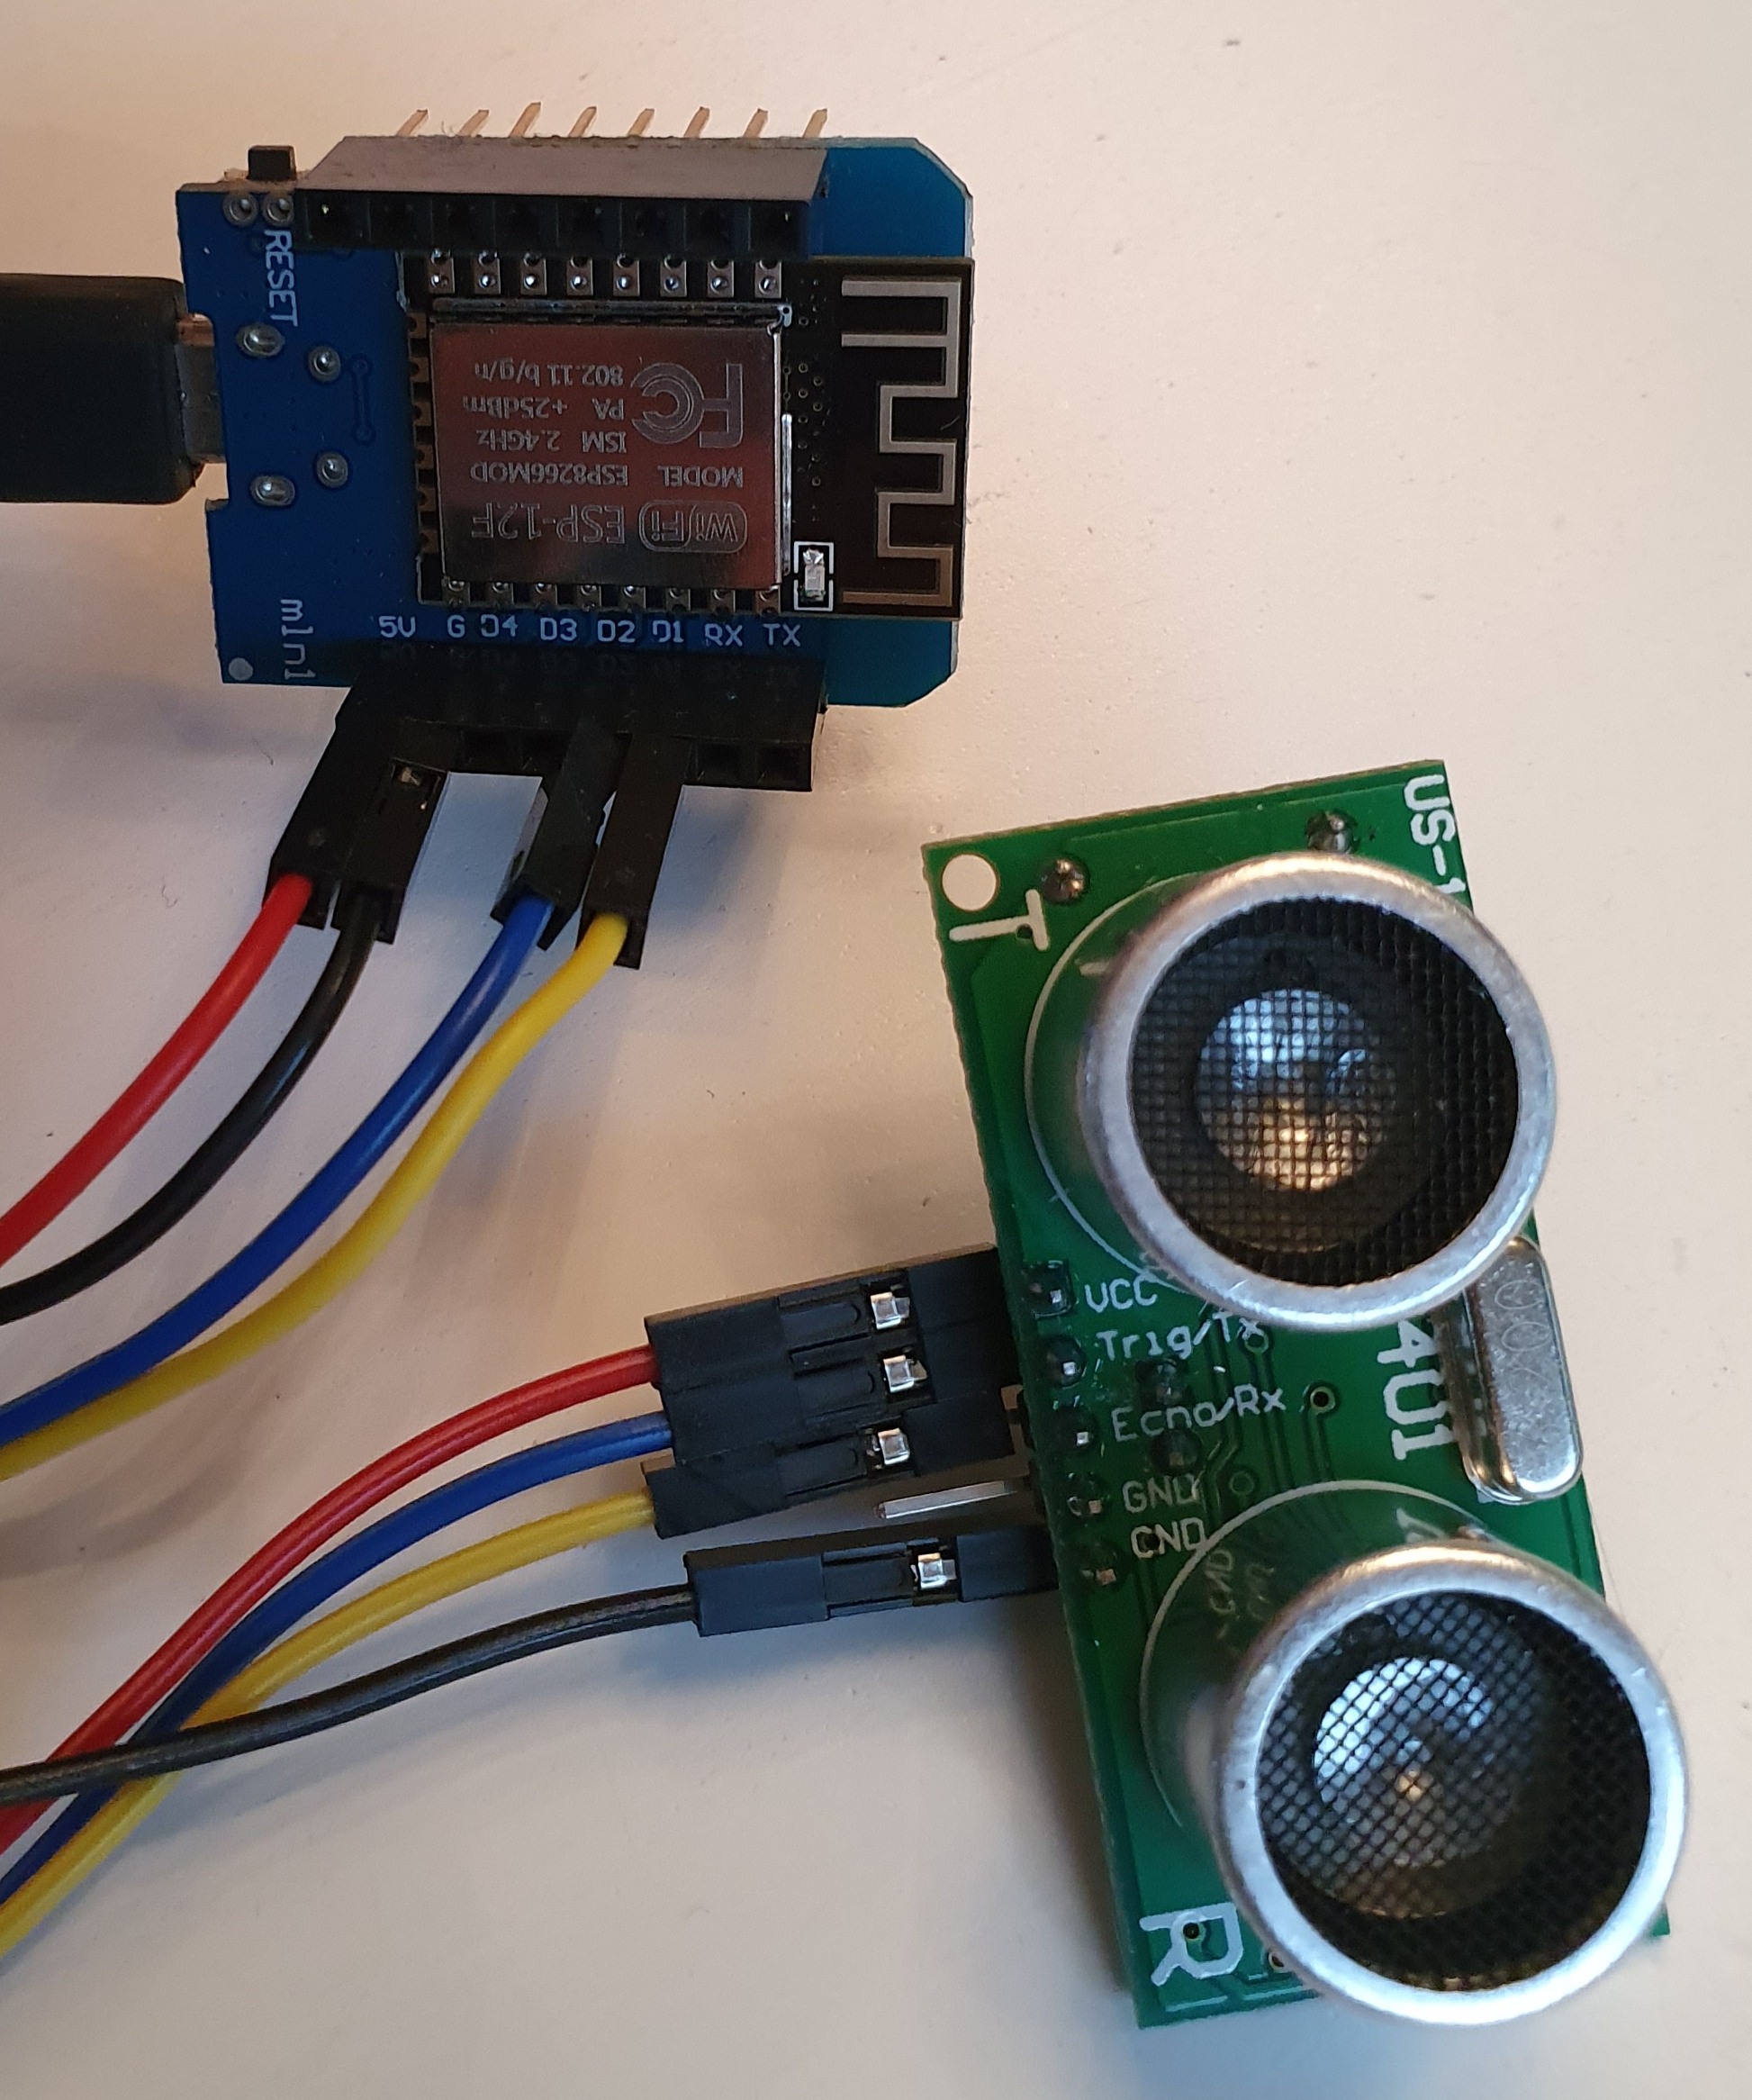
In reality, it should look like this.
Then we configure the following Arduino sketch with SSID, PASSWORD and POWER BI API PUSH URL and upload it to the WeMos D1 mini.
#include <SoftwareSerial.h>;
#include <NTPClient.h>
#include <WiFiUdp.h>
#include <ESP8266WiFi.h>
#include <ESP8266WiFiMulti.h>
#include <ESP8266HTTPClient.h>
#include <WiFiClientSecureBearSSL.h>
// Fingerprint Power BI Certificate
const uint8_t fingerprint[20] = {0x23, 0x05, 0x3d, 0x63, 0x7d, 0x4c, 0x86, 0x66, 0x84, 0x17, 0x47, 0xe6, 0x37, 0x6b, 0xed, 0xbb, 0x23, 0x0b, 0x8d, 0xac};

WiFiUDP ntpUDP;
NTPClient timeClient(ntpUDP, "pool.ntp.org", 0, 3600000);

/**********************
 * SET WIFI CREDENTIALS
 **********************/
const char* ssid  = "<SSID>";
const char* password = "<PASSWORD>";

/***************************
 * SET Power BI API Push-URL
 ***************************/
const String pushURL = "<POWER BI API PUSH-URL>";

// defines pins numbers
const int US100_TX = 4;
const int US100_RX = 5;

SoftwareSerial US100Serial(US100_RX, US100_TX);

unsigned int MSByteDist = 0;
unsigned int LSByteDist = 0;
unsigned int mmDist = 0;
int temp = 0;

String formattedDate;
String jsonString;

void setup() {
    Serial.begin(9600);
    US100Serial.begin(9600);

    Serial.print("Connecting to ");
    Serial.println(ssid);
    WiFi.begin(ssid, password);

    while(WiFi.status() != WL_CONNECTED) {
      delay(500);
      Serial.print(".");
    }

    Serial.println("");
    Serial.println("WiFi connected.");
    Serial.println("IP address: ");
    Serial.println(WiFi.localIP());

    Serial.println("Start time client...");

    timeClient.begin();
    timeClient.update();
}

void loop() {

    US100Serial.flush();
    US100Serial.write(0x55);

    delay(500);

    if(US100Serial.available() >= 2)
    {
        MSByteDist = US100Serial.read();
        LSByteDist = US100Serial.read();
        mmDist  = MSByteDist * 256 + LSByteDist;
        if((mmDist > 1) && (mmDist < 10000))
        {
            Serial.print("Distance: ");
            Serial.print(mmDist, DEC);
            Serial.println(" mm");
        }
    }

    US100Serial.flush();
    US100Serial.write(0x50);

    delay(500);
    if(US100Serial.available() >= 1)
    {
        temp = US100Serial.read();
        if((temp > 1) && (temp < 130)) // temprature is in range
        {
            temp -= 45; // correct 45º offset
            Serial.print("Temp: ");
            Serial.print(temp, DEC);
            Serial.println(" ºC.");
        }
    }

    timeClient.update();
    formattedDate = timeClient.getFormattedDate();

    Serial.print("DateTime: ");
    Serial.println(formattedDate);

    jsonString = "[{\"DateTime\": \"" + formattedDate + "\", \"Distance\": " + String(mmDist) + ", \"Temprature\": " + String(temp) + "}]";

    Serial.print("Json: ");
    Serial.println(jsonString);
    Serial.println();

    std::unique_ptr<BearSSL::WiFiClientSecure>client(new BearSSL::WiFiClientSecure);

    client->setFingerprint(fingerprint);

    HTTPClient https;

    Serial.print("[HTTPS] begin...\n");
    // configure traged server and url

    https.begin(*client, pushURL);
    https.addHeader("Content-Type", "application/json");

    Serial.print("[HTTPS] POST...\n");
    // start connection and send HTTP header

    int httpCode = https.POST(jsonString);

    // httpCode will be negative on error
    if (httpCode > 0) {
      // HTTP header has been send and Server response header has been handled
      Serial.printf("[HTTPS] POST... code: %d\n", httpCode);

      // file found at server
      if (httpCode == HTTP_CODE_OK) {
        String payload = https.getString();
        Serial.println(payload);
      }
    } else {
      Serial.printf("[HTTPS] POST... failed, error: %s\n", https.errorToString(httpCode).c_str());
      String payload = https.getString();
      Serial.println(payload);
    }

    https.end();

    delay(9000);
}
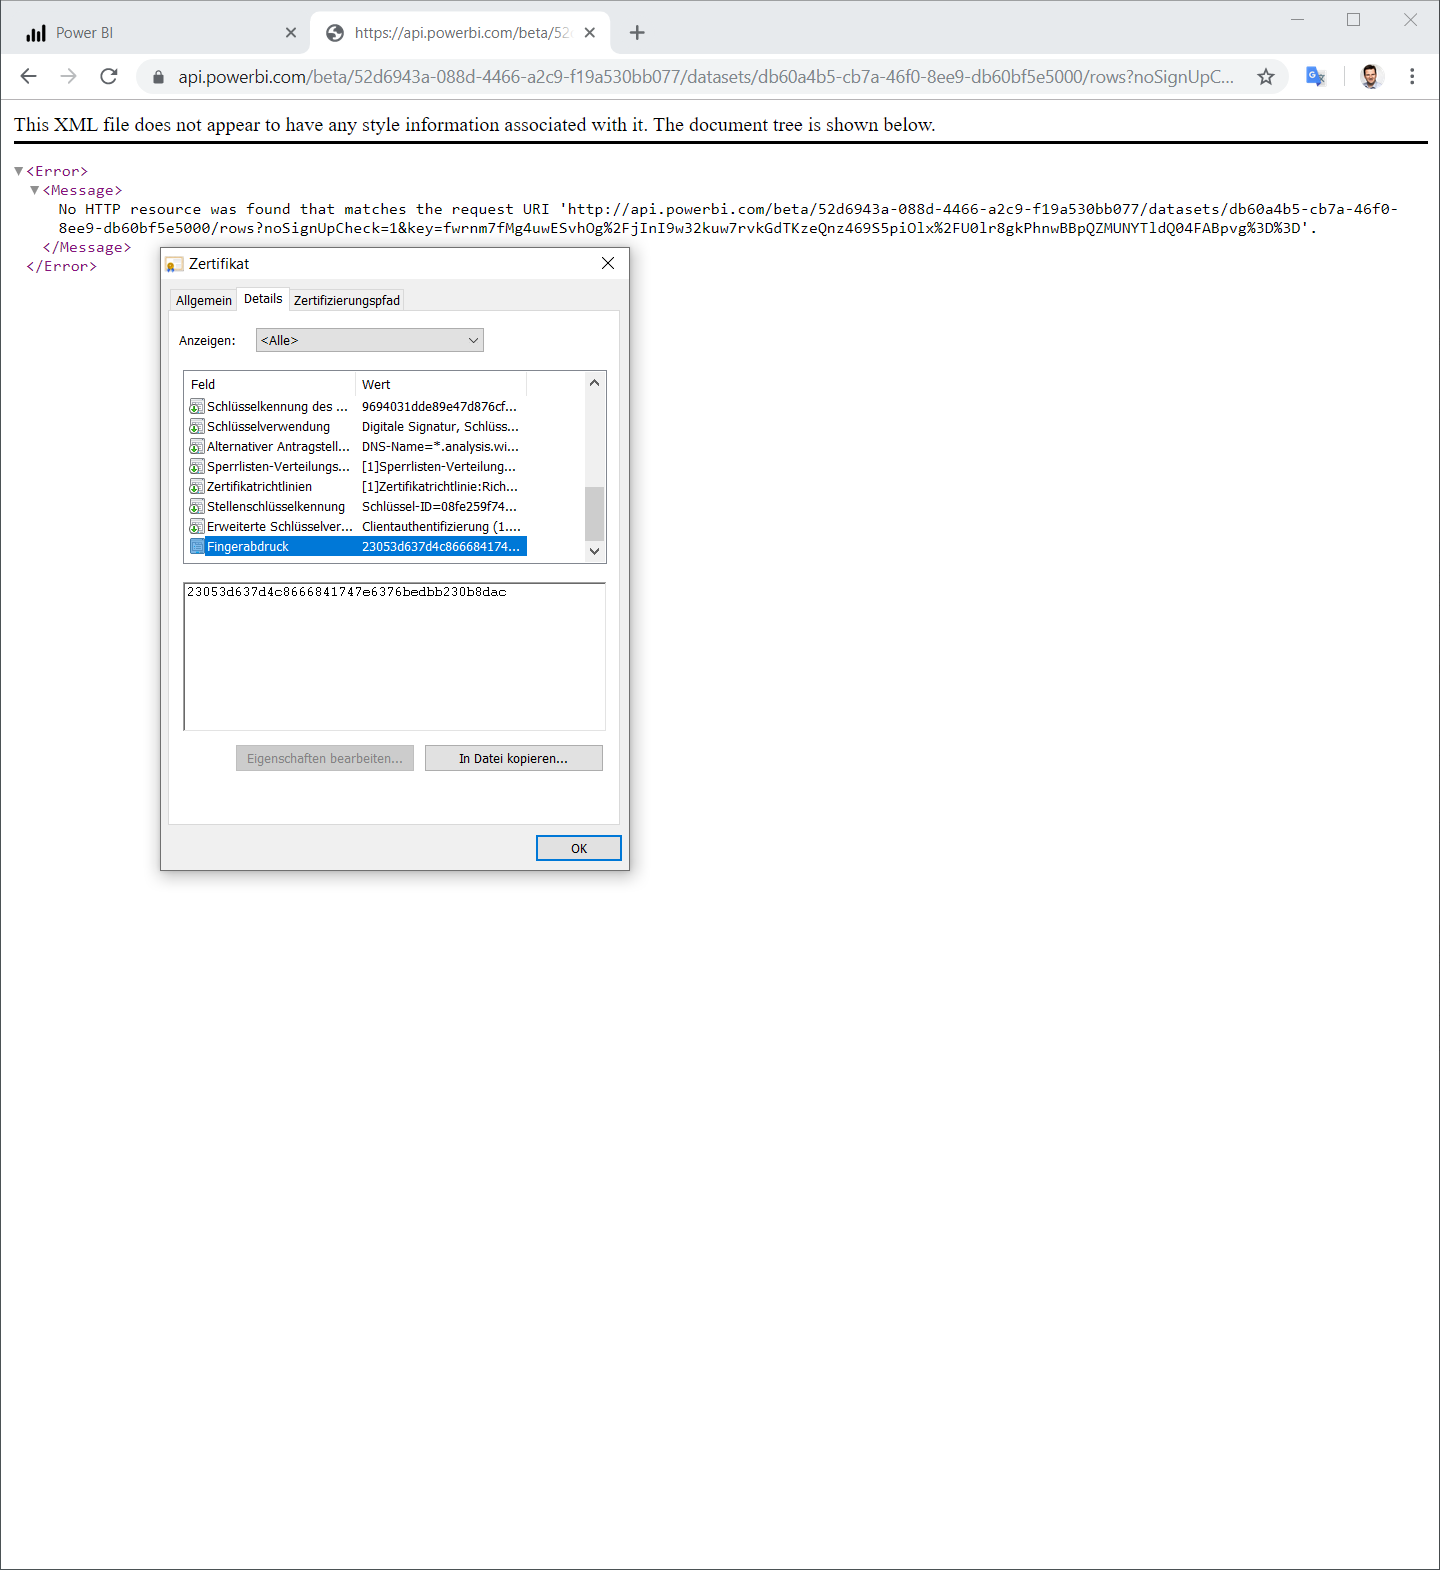
The „Fingerprint“ of the Power BI API certificate can be read out via the lock symbol in the browser bar.
In the Arduino board management I loaded the package esp8266 in the version 2.5.0, because I have problems with the SoftwareSerial library in the newer versions.
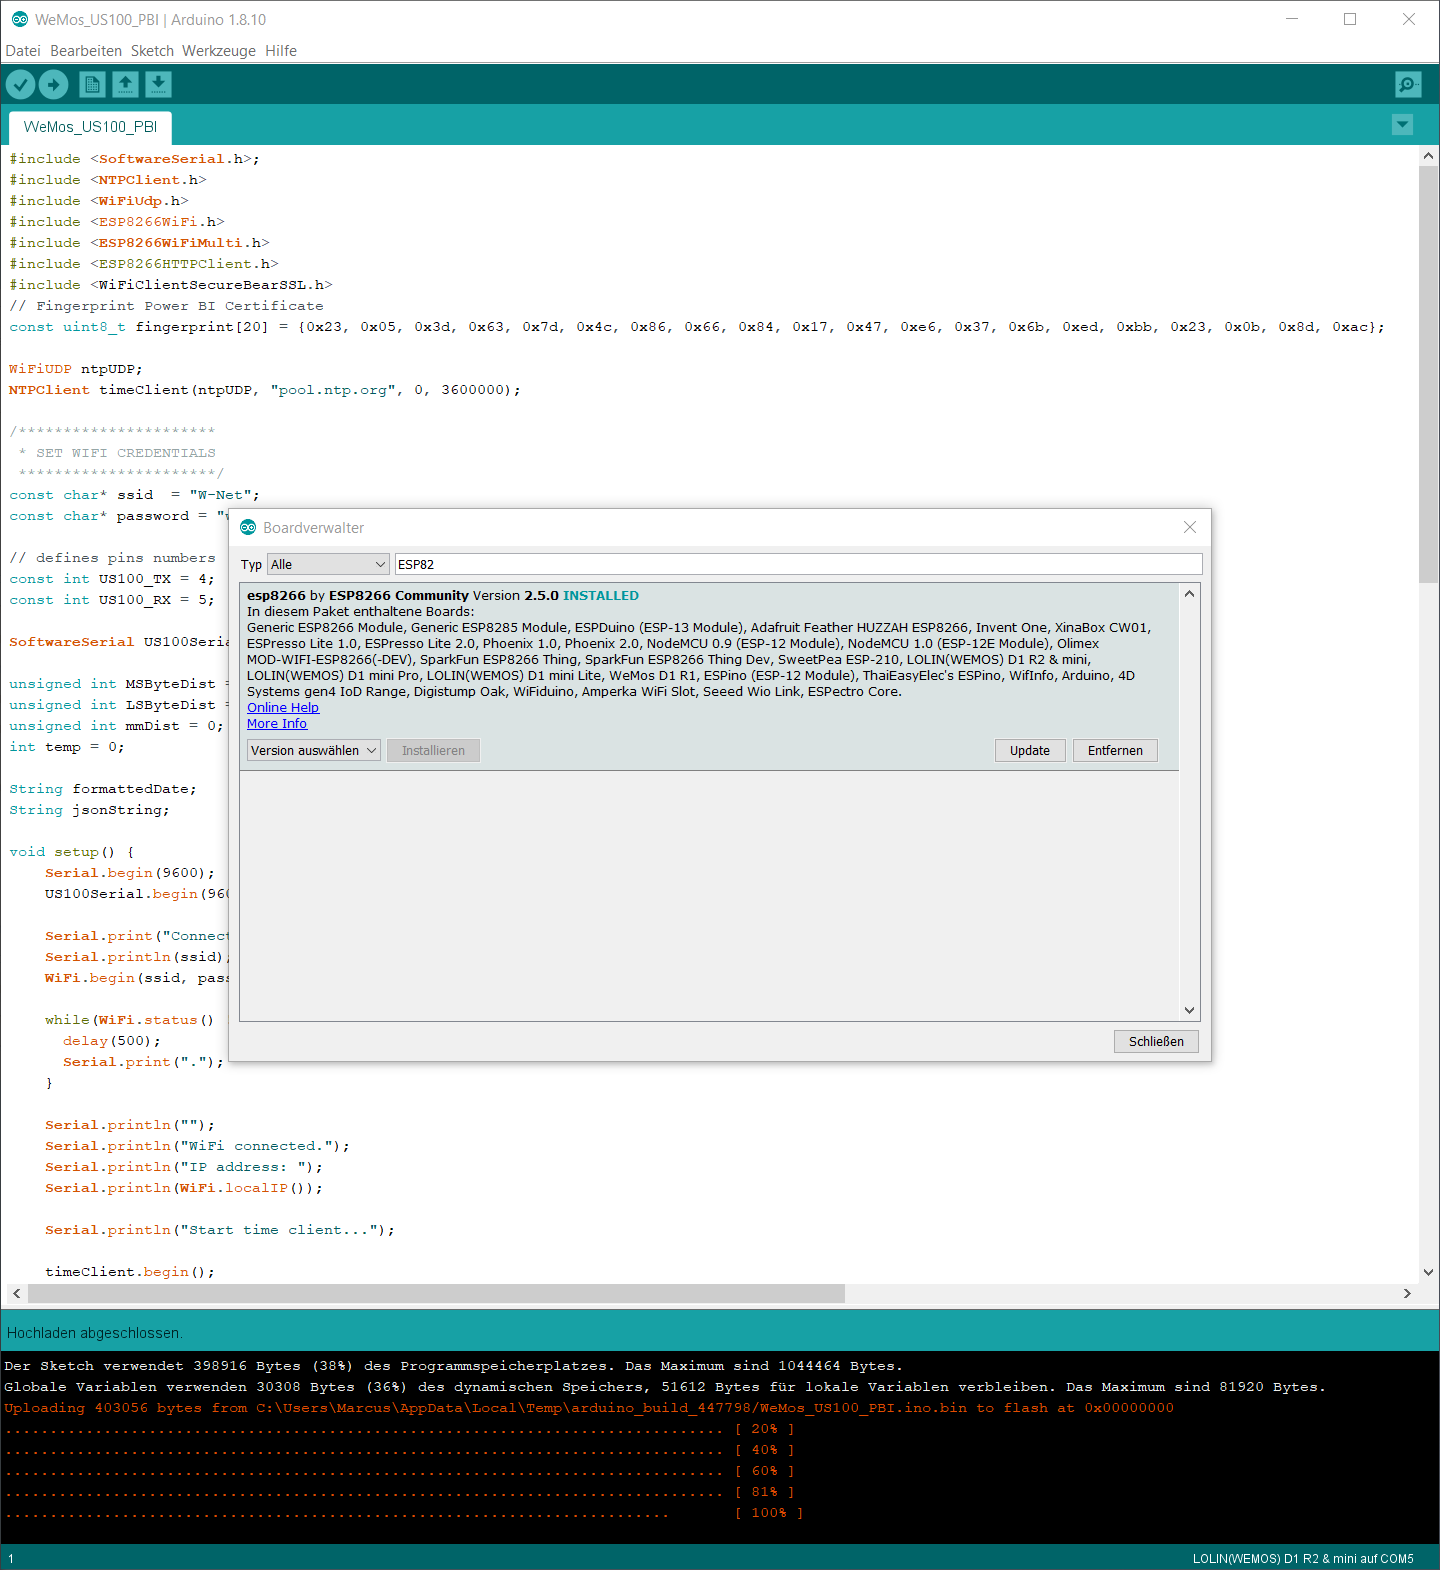
As an NTP client I use the custom library „NTP Client library forked by Taranais„. This provides a getFormattedDate() function, which is used to convey the DateTime value.
Creation Sensor Dashboard
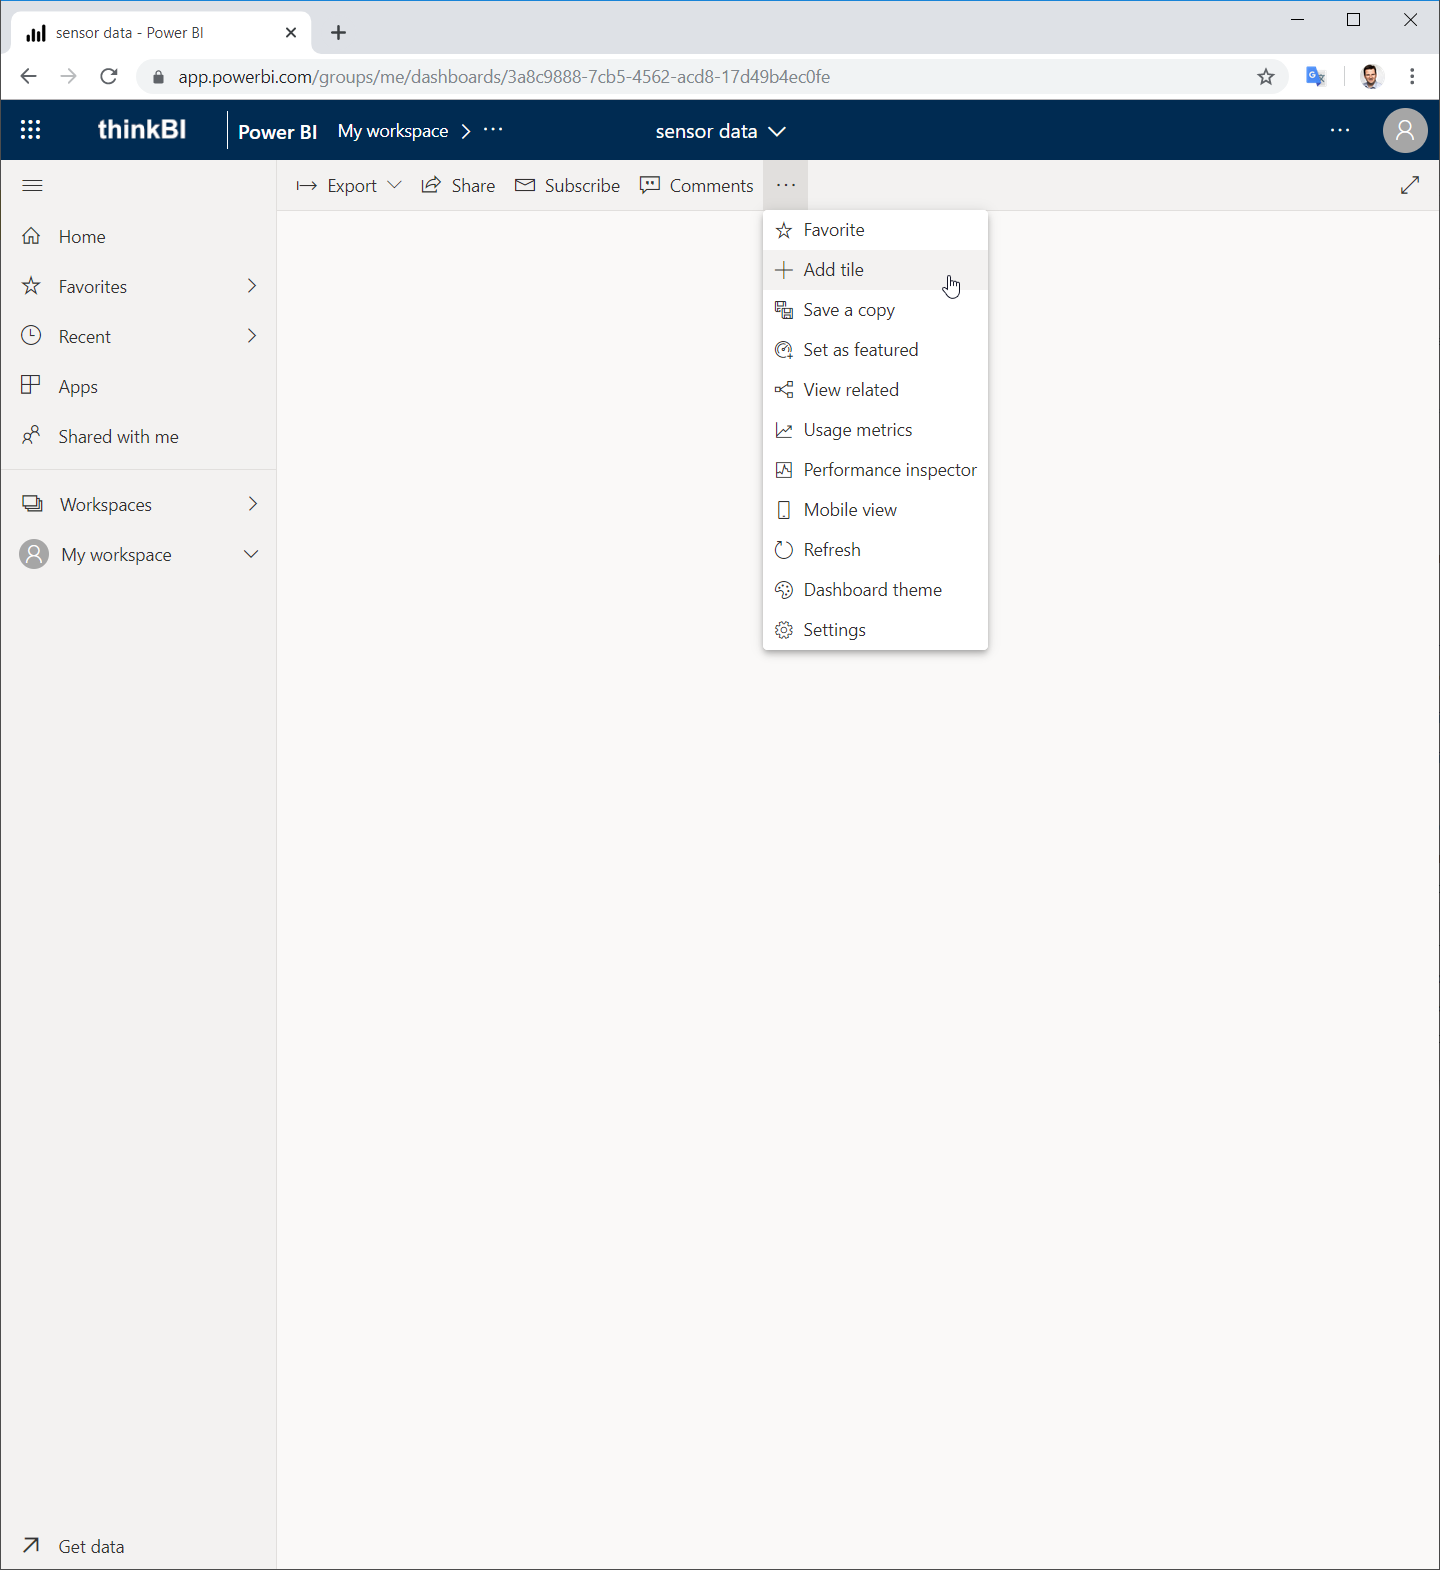
Back in the Power BI service, you add a new tile to a new dashboard.
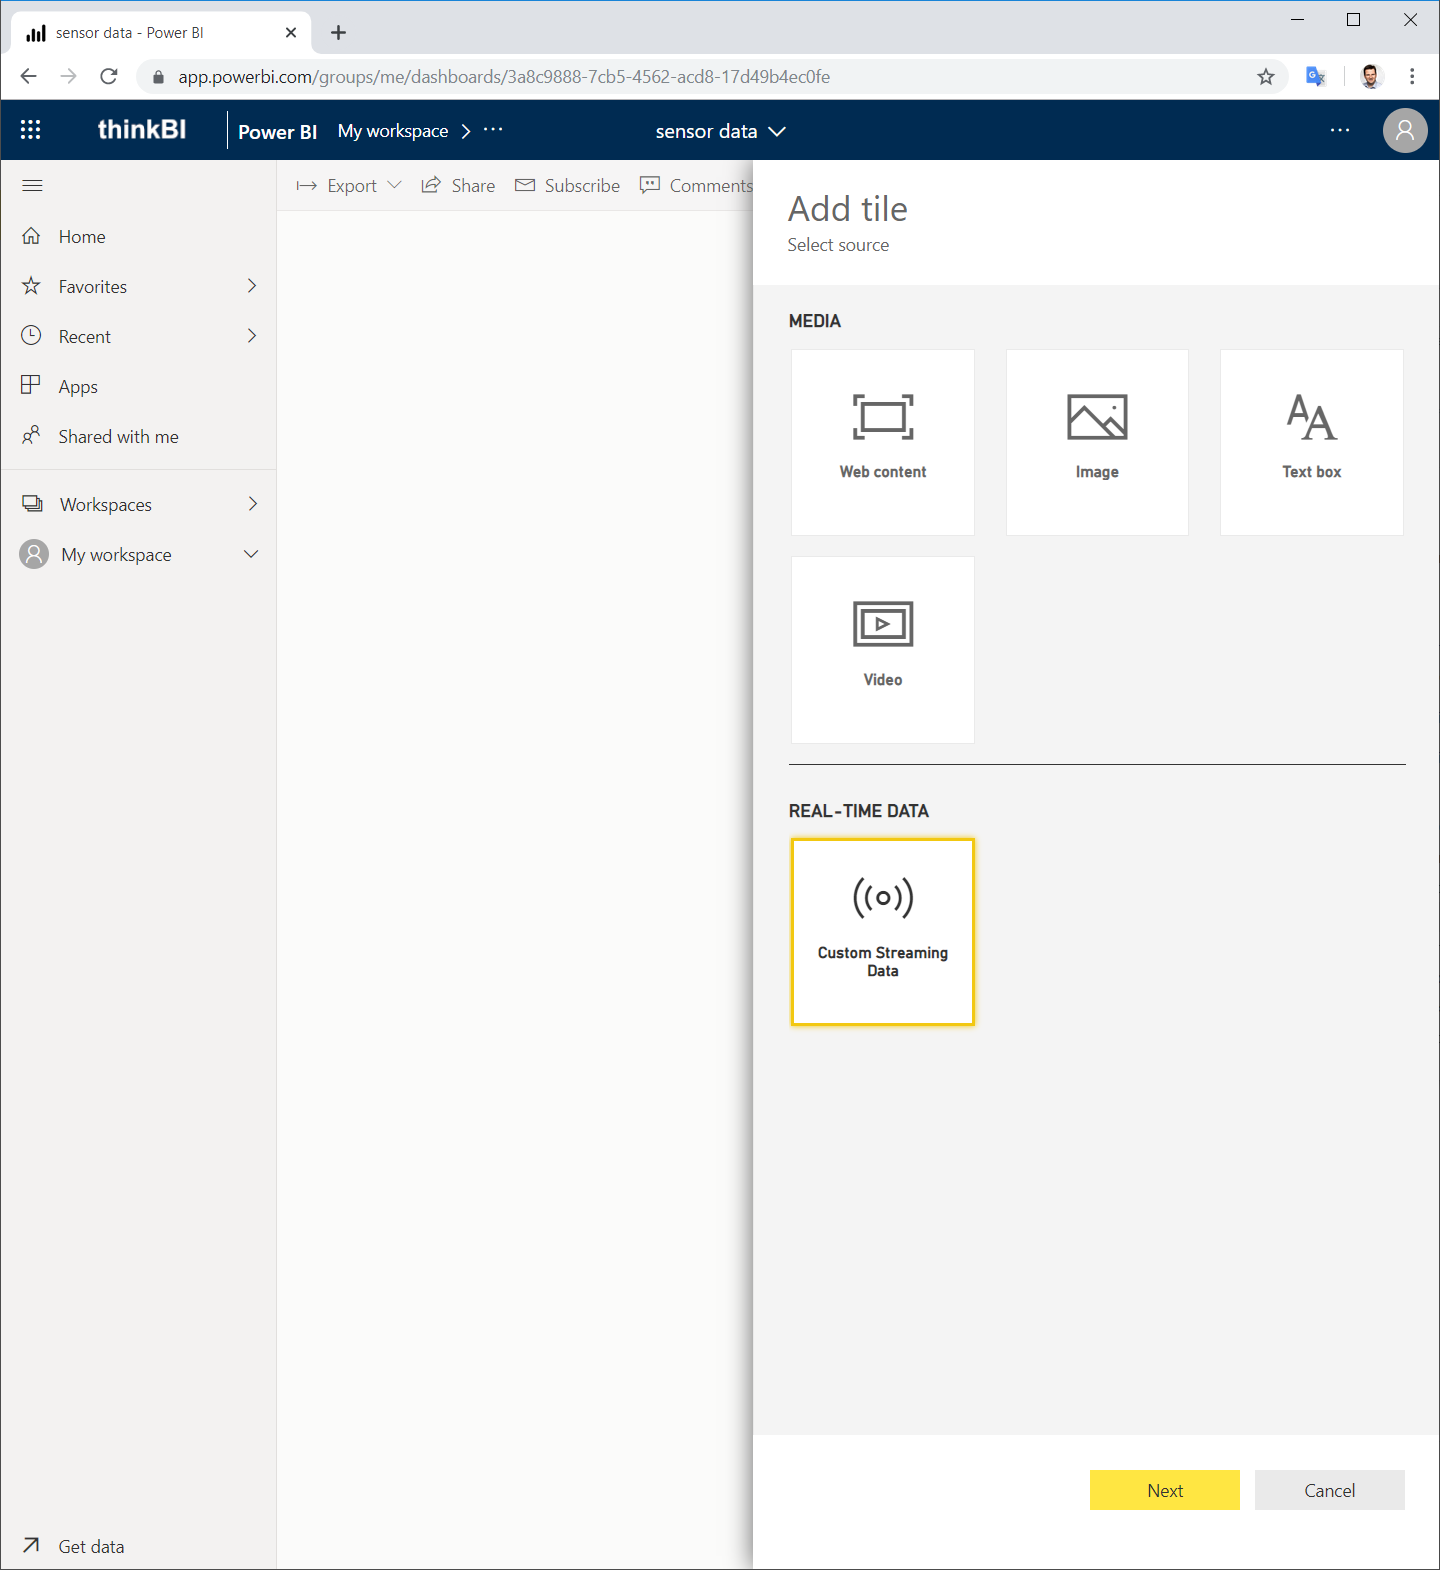
As the source for the tile, select Custom Streaming Data.
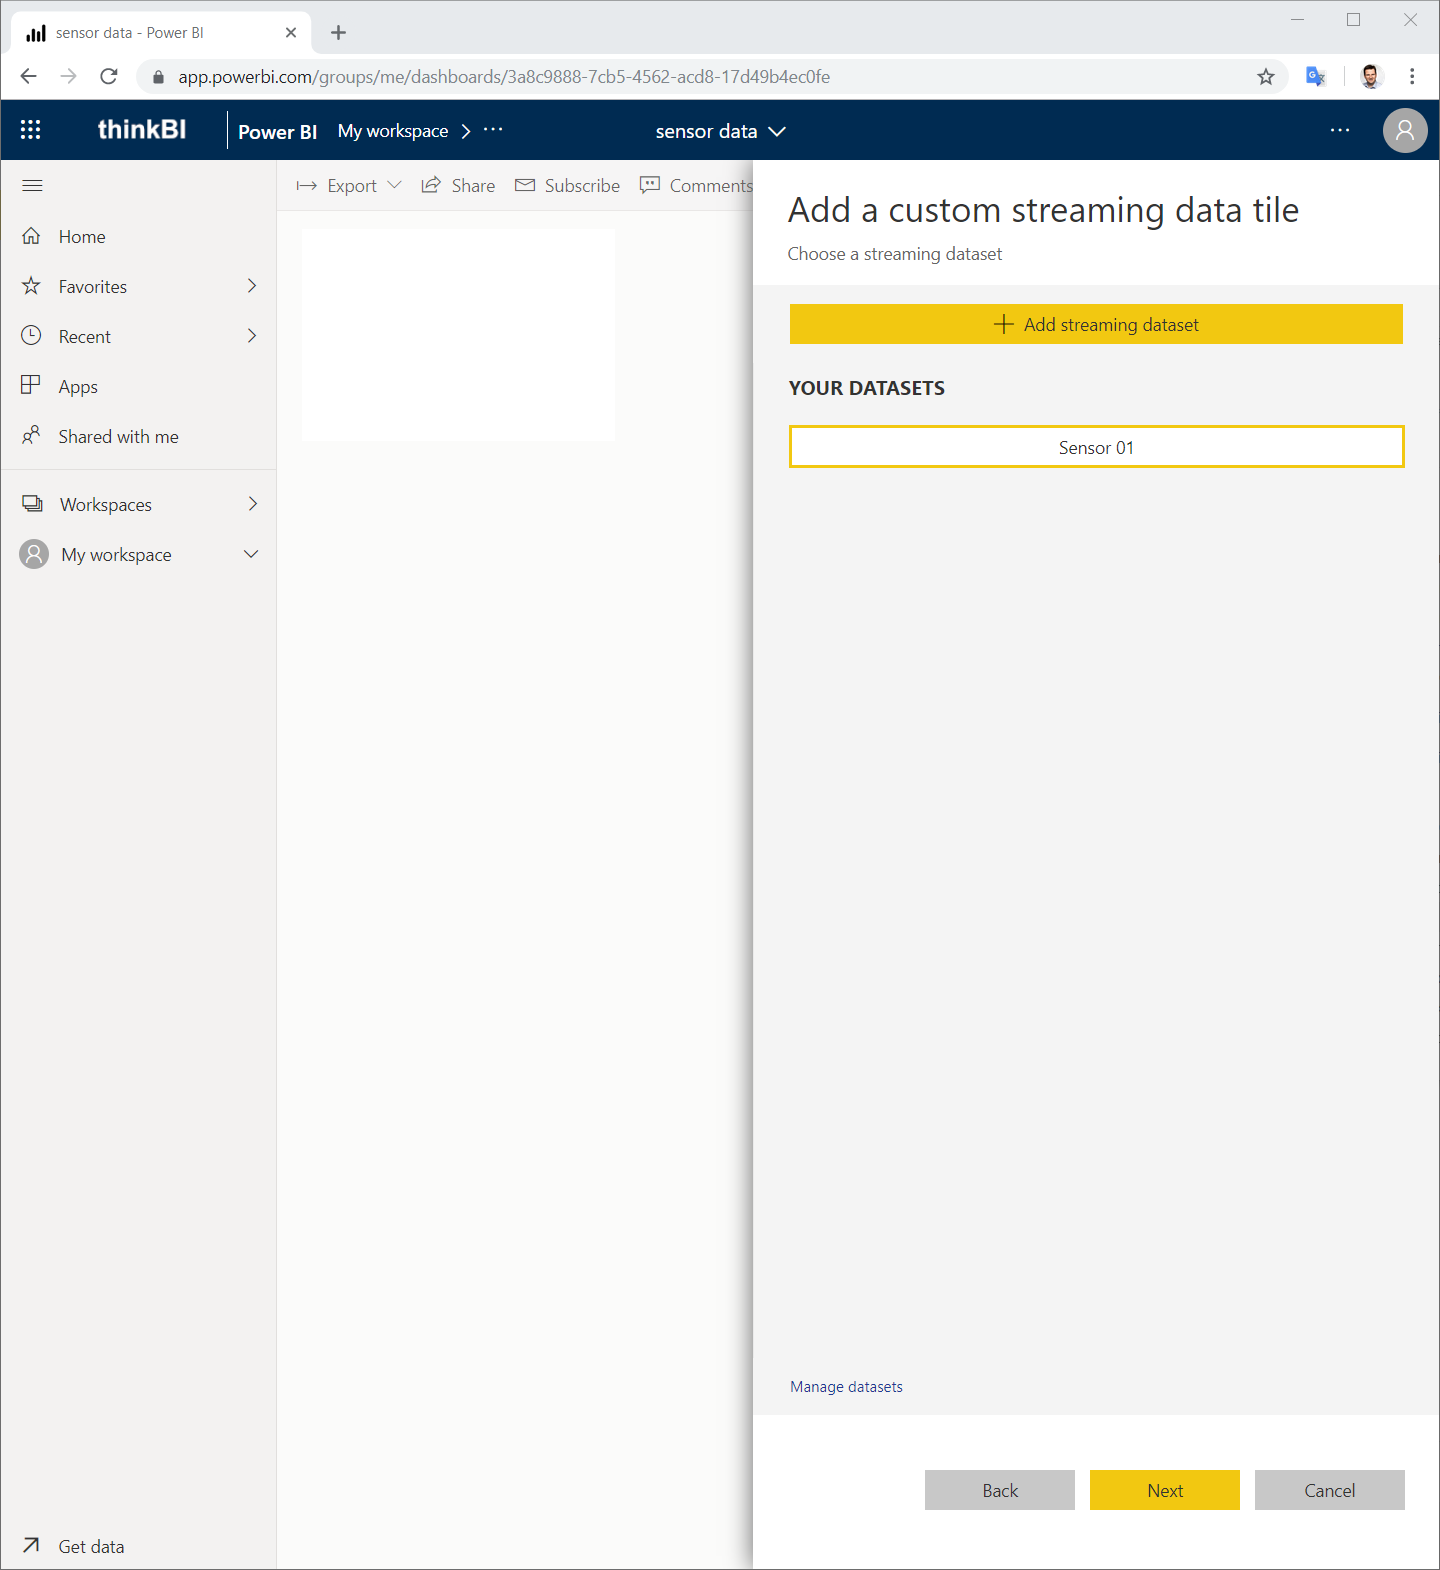
Select your streaming dataset.
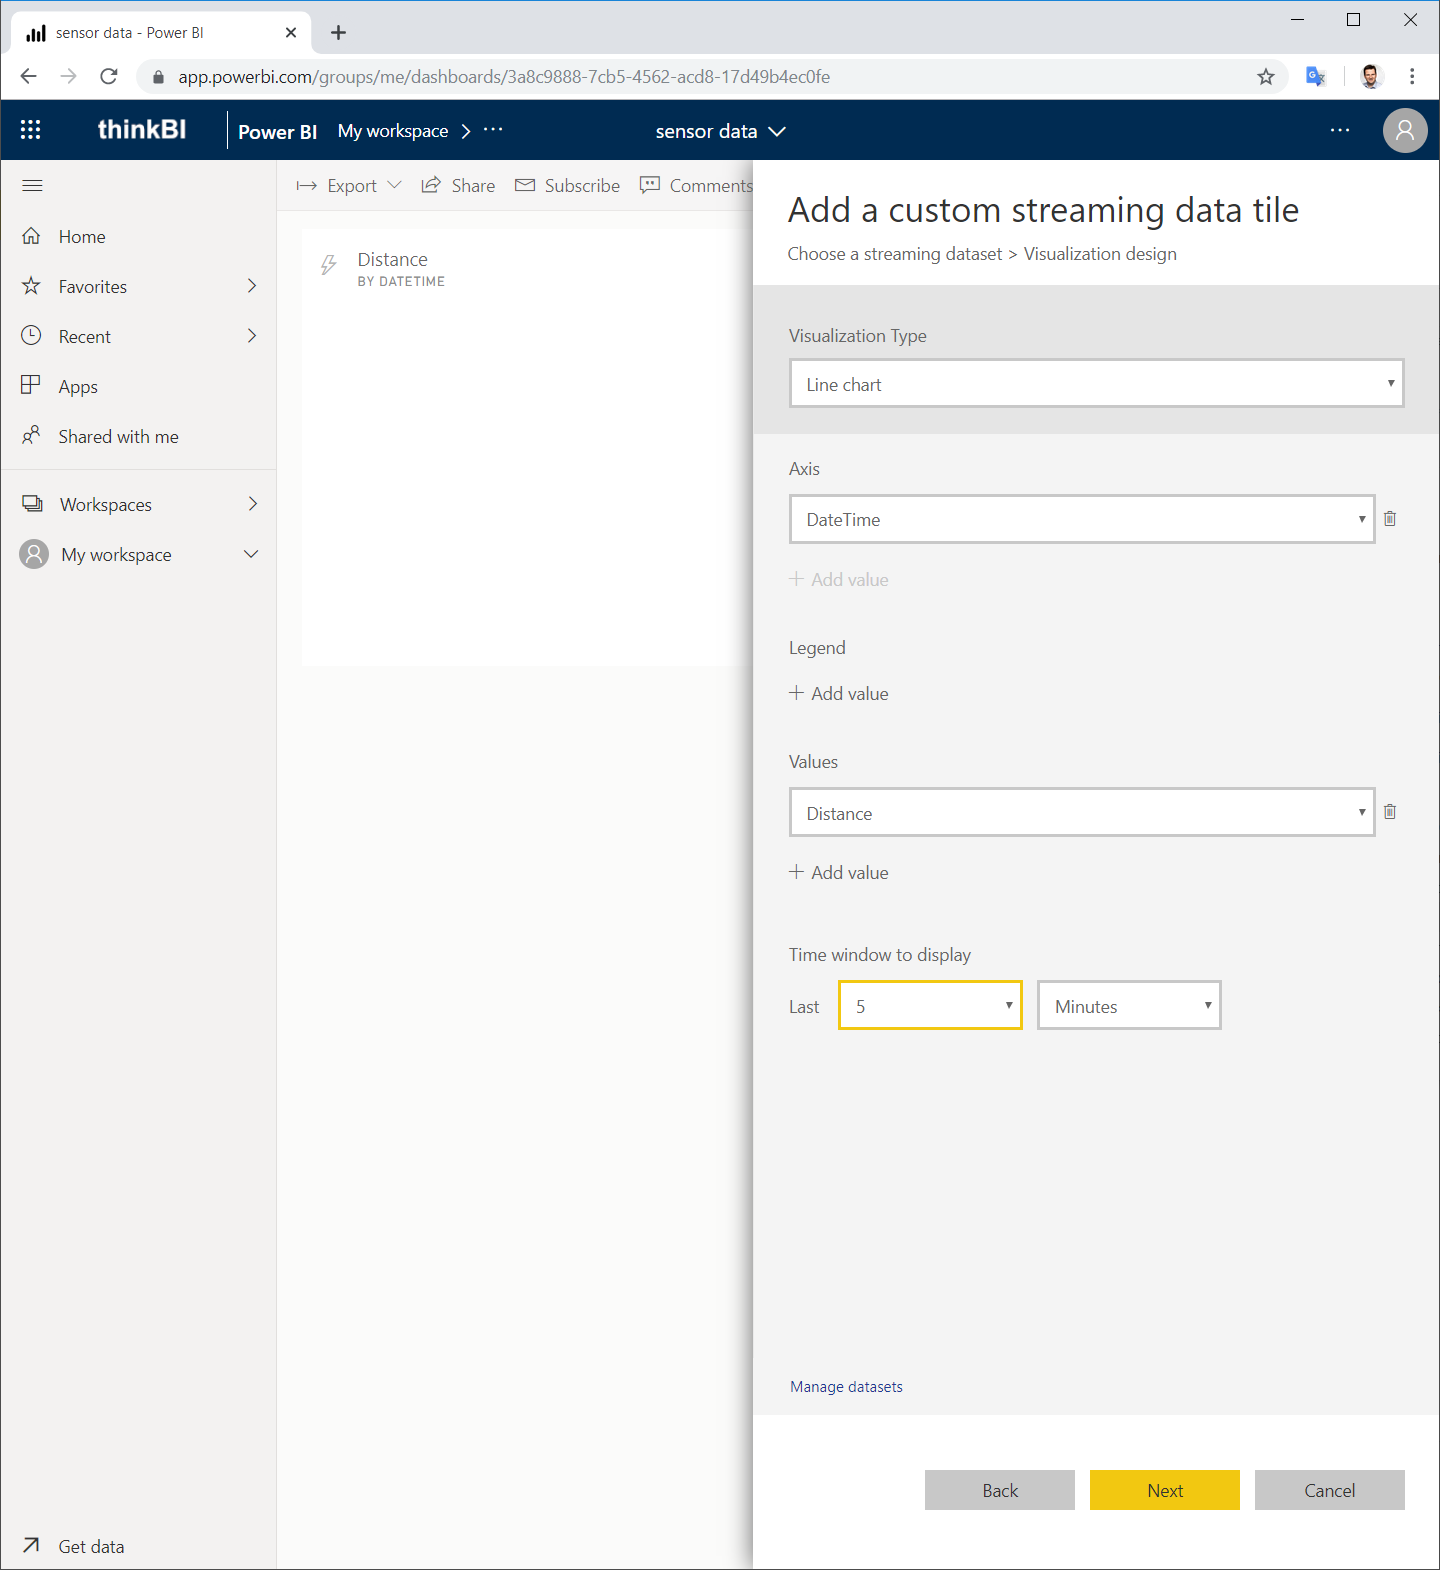
Choose the visualization type for your streaming data.
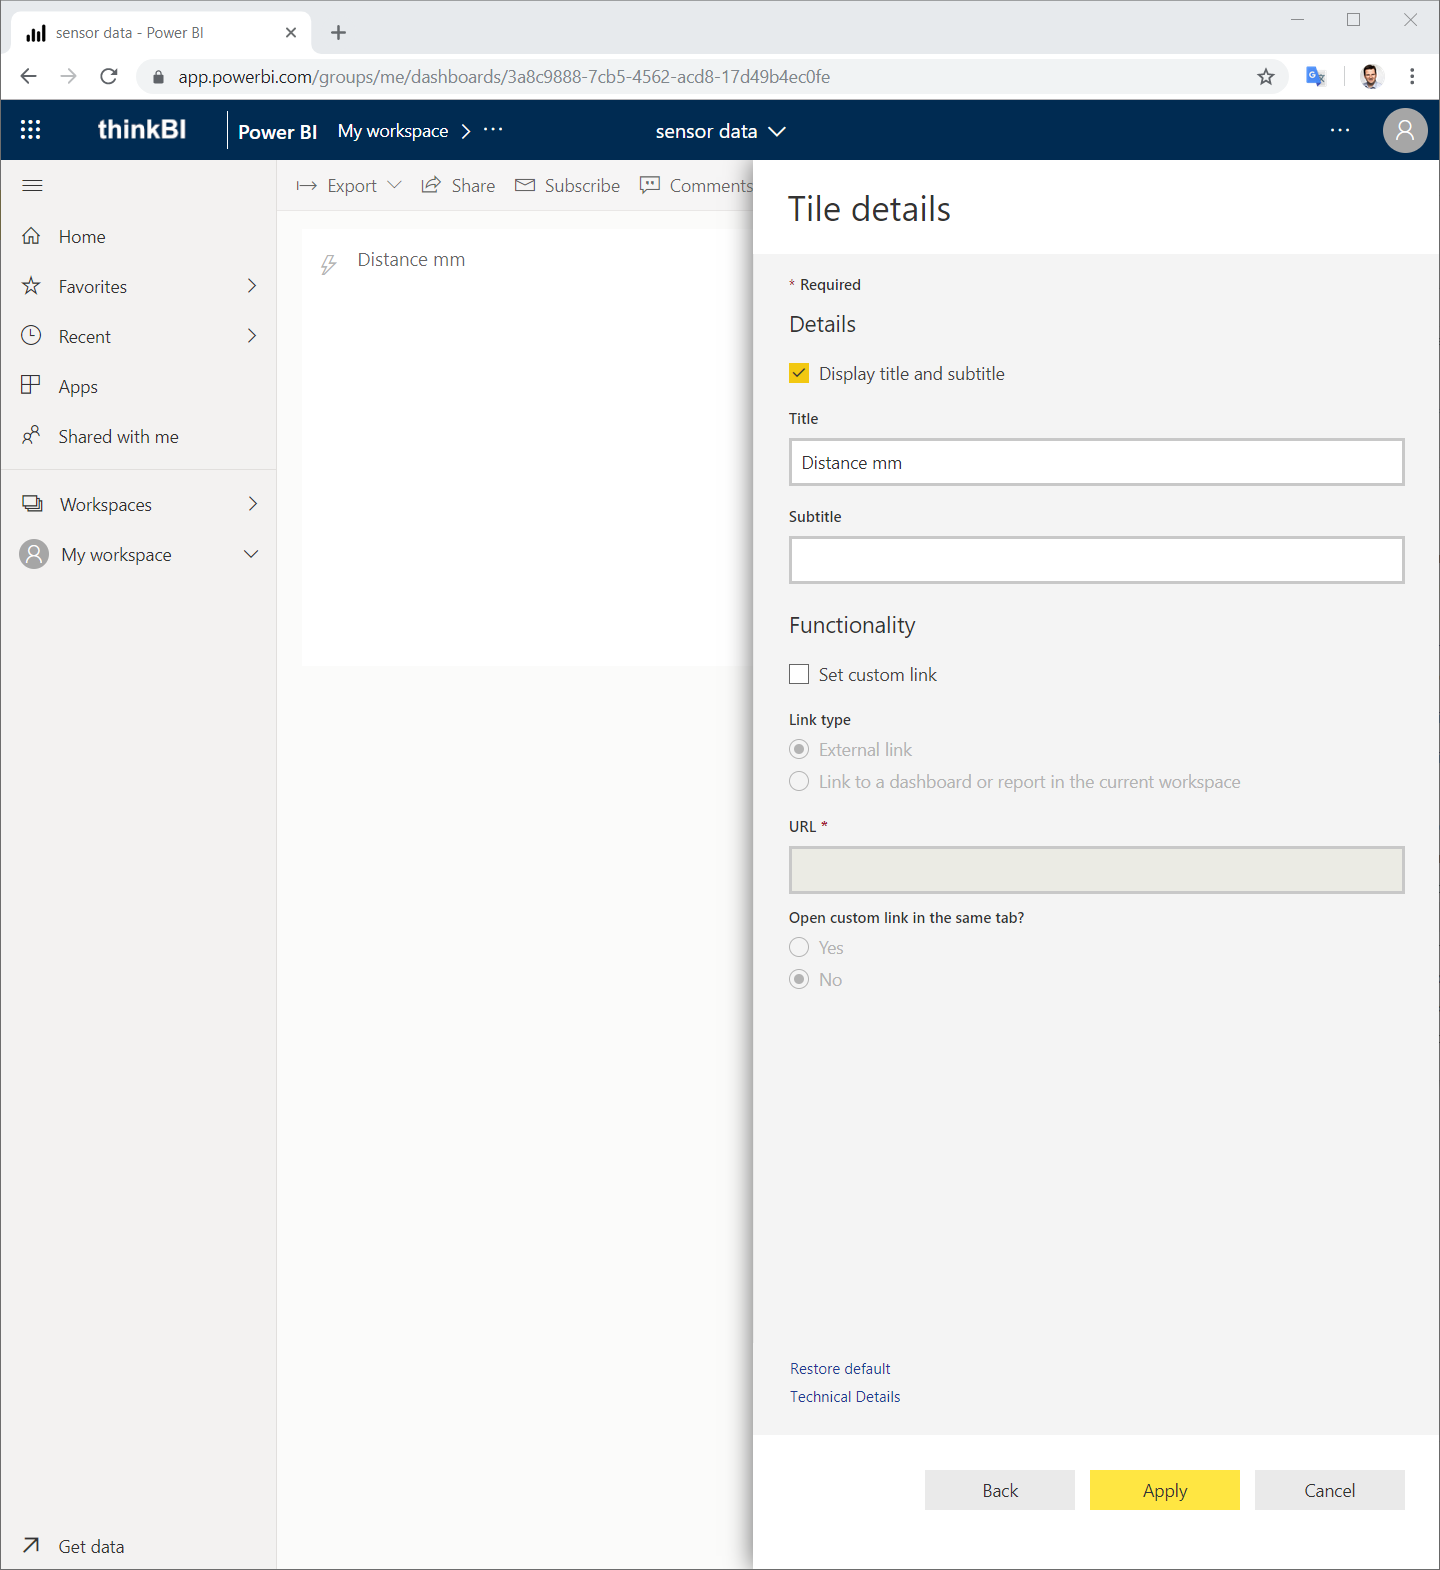
Finally, you can define additional Tile details.
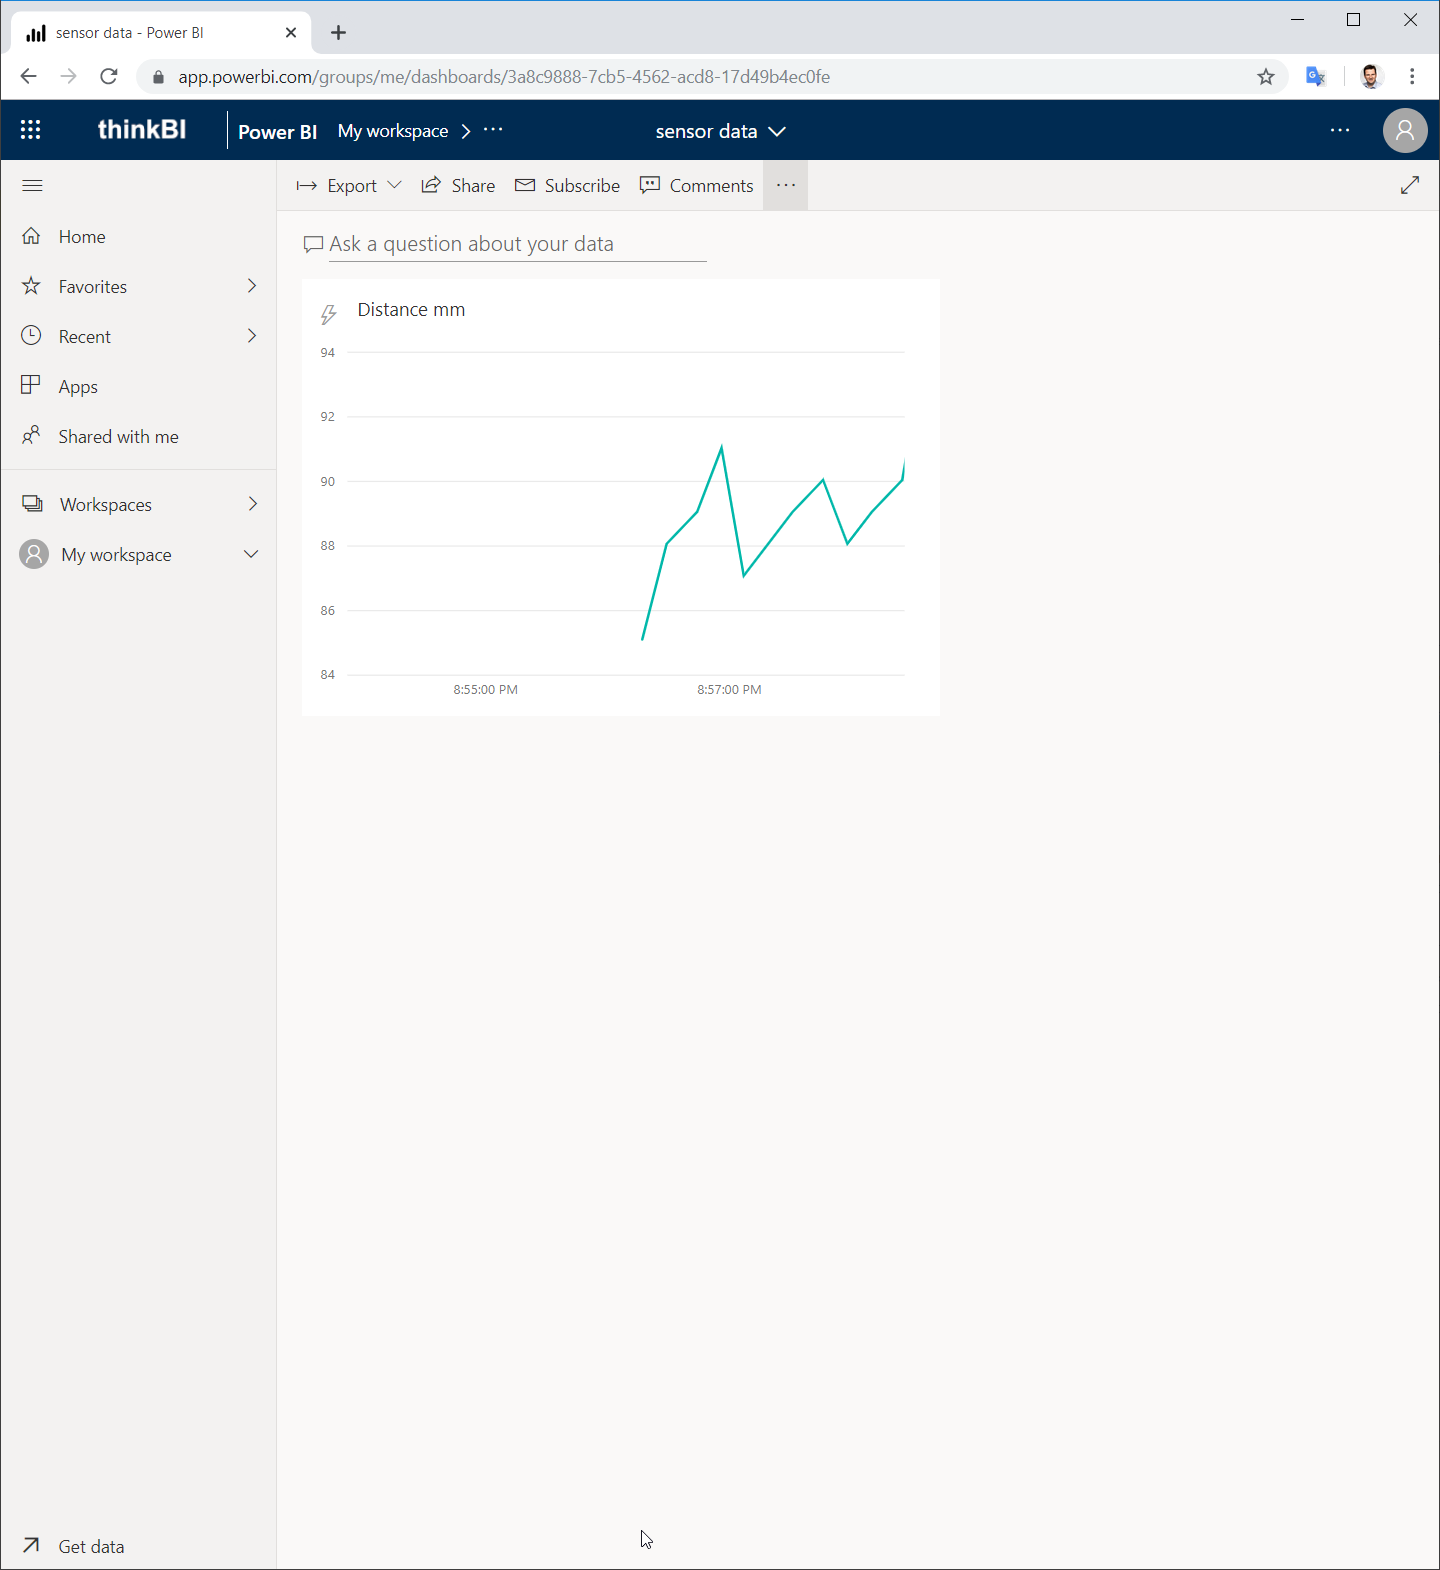
Now you should see how your data is streamed in Power BI.
Hi, I’m trying to do the same process with an esp8266, however the post http request doesn’t happen permanently, it connects a few times and then it starts to get a „connection refused“ error. Please do you know what is causing this error?
I noticed that the SHA-1 key keeps changing…
Hi, unfortunately I do not know the cause of the error. I have not worked with it after this prototype.
Służysz społeczności blogowej, pięknie przy tym składasz frazy, przyjmij najszczersze wdzięczności moich wyrazy 🙂